2D to 3D Print: Transform Your Sketch into an Object in Luxembourg
Introduction: From Concept to Reality – Your 2D Designs in 3D
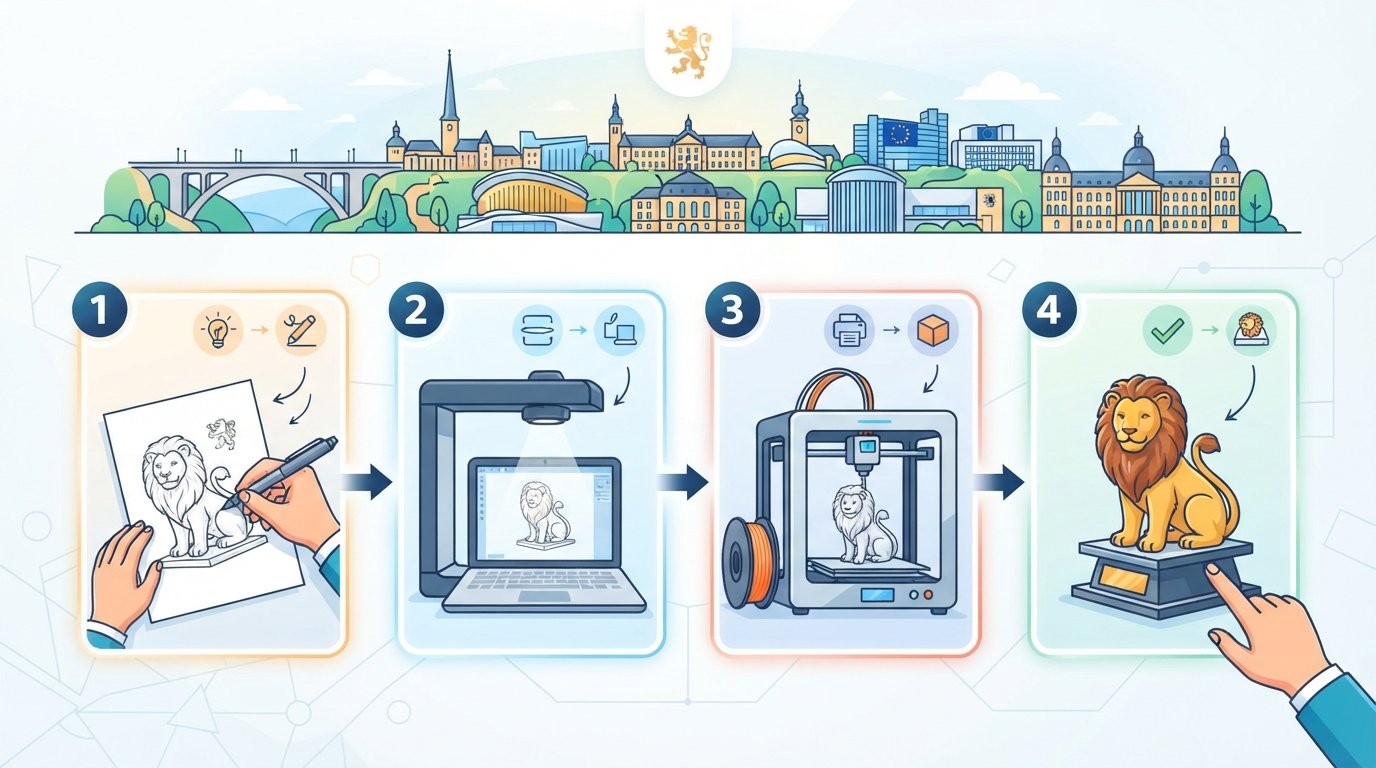
Have you ever looked at a sketch, a technical drawing, or even a simple doodle and wished you could hold it in your hands? The world of 3D printing has made this transformation not just possible, but incredibly accessible. This comprehensive guide will walk you through the exciting process of converting your two-dimensional ideas, sketches, and designs into tangible, high-quality 3D printed objects, specifically tailored for individuals and businesses across the EU, including our valued clients in Luxembourg.
Whether you're an inventor with a groundbreaking prototype idea, a small business seeking custom parts, a designer bringing a unique vision to life, or a hobbyist looking to create bespoke items, understanding this journey is key. We'll demystify the steps involved, from refining your initial concept and translating it into a digital 3D model, to selecting the perfect material and finding the right 3D printing partner. You'll learn how to navigate the technical aspects, avoid common pitfalls, and ultimately hold a physical manifestation of your creativity. Forget the hassle of owning and maintaining your own 3D printer; with expert services available, bringing your 3D dreams to life has never been easier or more efficient, particularly for those seeking a reliable entreprise impression 3d luxembourg.
What You'll Need
- A clear 2D design, sketch, or concept.
- Accurate dimensions and measurements.
- An understanding of the object's intended function and environment.
- Access to 3D design software (or a 3D design service).
- A reliable 3D printing service or supplier for high-quality 3D printer filament.
Who This Is For
- Entrepreneurs and startups needing prototypes.
- Engineers and product developers requiring custom parts.
- Designers and artists bringing unique creations to life.
- Hobbyists and makers without access to their own 3D printer.
- Businesses in Luxembourg looking for custom 3D printing services.
Step 1: Refine Your 2D Concept & Gather Comprehensive Details
The journey from a flat drawing to a physical object begins with a meticulously refined concept. Before you even think about digital design, you need to ensure your 2D design is as complete and detailed as possible. This foundational step is critical because any ambiguity or lack of information at this stage can lead to costly revisions or unsatisfactory results later on.
Consider the purpose of your object. Is it purely aesthetic, a functional component, or a prototype for testing? Its intended use will dictate many design choices, from material selection to structural integrity. Gather all relevant measurements, angles, curves, and any specific textual or graphical elements you wish to incorporate. Think about how different parts will connect, if there are moving components, or if it needs to fit within a larger assembly. The more information you can provide, the smoother the transition to 3D will be.
- Sketch with Clarity: If it's a hand sketch, use clear lines, label parts, and indicate front, side, and top views. For digital 2D designs, ensure all layers are visible and editable.
- Define Dimensions: Accurately measure and note down all critical dimensions in millimetres (mm) or inches, ensuring consistency across all views.
- Detail Functionality: Describe the object's purpose, how it will be used, and any specific interactions it needs to perform.
- Consider Assembly: If your object has multiple parts, sketch how they will fit together. Note any tolerances or clearances required.
- Note Material Preferences (Initial Thoughts): While not final, consider if your object needs to be rigid, flexible, heat-resistant, or transparent. This helps guide the 3D designer.
Tip: It can be helpful to draw your design on a grid paper to maintain proportions and ensure accurate scaling. If collaborating with a 3D designer, clear, annotated sketches are invaluable for efficient communication.
Step 2: Choose Your 3D Design Approach – DIY or Professional Service
Once your 2D concept is meticulously detailed, the next crucial step is to translate it into a three-dimensional digital model. This is where CAD (Computer-Aided Design) software comes into play. You essentially have two primary routes: designing it yourself or enlisting a professional 3d design service luxembourg.
Designing it yourself requires an investment in software and learning curve, but offers maximum control and flexibility for iterative designs. If you're new to CAD, however, the learning curve can be steep, and achieving print-ready models might prove challenging. Professional services, on the other hand, leverage expertise and advanced software to quickly and accurately convert your 2D vision into a robust 3D model, ensuring it's optimised for 3D printing from the outset. For complex geometries, tight tolerances, or simply saving time, a professional service is often the most efficient and reliable option, providing expert création modèle 3d luxembourg.
- DIY CAD Software:
- Beginner-Friendly: Tinkercad (web-based, intuitive), SketchUp (good for architectural/simple shapes).
- Intermediate/Advanced: Fusion 360 (powerful, free for hobbyists/startups), SolidWorks (industry standard, professional), Blender (excellent for organic shapes, free).
- Pros: Full control, learning valuable skills, cost-effective if you have the time.
- Cons: Steep learning curve, potential for errors if inexperienced, time-consuming.
- Professional 3D Design Service:
- Services Offered: Converting 2D sketches/drawings into CAD files, optimising existing 3D models for printability, reverse engineering.
- What to Look For: Experience in your industry, portfolio of similar projects, clear communication, rapid turnaround times.
- Pros: Expert results, saves time, ensures printability, access to advanced software.
- Cons: Higher upfront cost compared to DIY (but often saves money long-term by avoiding errors).
Warning: Attempting complex 3D designs without adequate CAD experience can lead to models that are not watertight, have intersecting geometries, or are simply unprintable, resulting in wasted time and money. Consider a service like PrintIn3D's 3D design service for reliable results.
Step 3: Translate 2D to 3D CAD Model – The Digital Transformation
This step is the core of transforming your flat concept into a digital, three-dimensional representation. Whether you're using software yourself or working with a designer, understanding the process is vital. The goal is to create a "watertight" 3D model – a solid object without any holes, internal inconsistencies, or intersecting faces that could confuse a 3D printer.
The process typically involves creating basic shapes (primitives), then extruding them, cutting away material, combining multiple shapes, and adding details like fillets, chamfers, and holes according to your 2D specifications. Precision is paramount here; every dimension and angle from your 2D design must be accurately reflected in the 3D model. The output will usually be a CAD file (e.g., .STEP, .IGES) that can then be exported to a mesh format like STL (.stl) or OBJ (.obj) for 3D printing.
- Start with Basic Geometry: Begin by outlining the main shapes and profiles from your 2D drawings.
- Extrude and Revolve: Use extrusion (pushing a 2D profile along an axis) or revolution (spinning a 2D profile around an axis) to create the main body of your object.
- Add and Subtract Material: Utilize boolean operations (combining, subtracting, intersecting shapes) to refine the model's form.
- Incorporate Details: Add features like holes, bosses, ribs, text, and logos. Ensure all dimensions match your 2D plans.
- Ensure Watertightness: Crucially, the model must be a single, solid volume without any gaps or non-manifold edges. Most CAD software includes tools to check for this.
- Export to Print-Ready Format: Convert your CAD file into a standard mesh format like STL (.stl) or OBJ (.obj). STL is the most common format for 3D printing.
Tip: When exporting to STL, choose an appropriate resolution. A higher resolution (finer mesh) results in a smoother surface but a larger file size. Too low a resolution can lead to faceted, rough surfaces on curved parts.
Step 4: Prepare Your 3D Model for Printing (Slicing)
Once you have a clean, watertight 3D model in a print-ready format like STL, the next step is to prepare it for the 3D printer. This is done using "slicer" software. A slicer program takes your 3D model and virtually slices it into hundreds or thousands of thin layers, generating a set of instructions (G-code) that the 3D printer can understand. This G-code dictates everything: print head movements, material extrusion, print speed, temperature, and more.
Slicing is where you define the specific parameters that will directly influence the quality, strength, and print time of your object. It's a critical stage where you make decisions about how the object will be built layer by layer, considering factors like orientation, support structures, and infill density.
- Load Your Model: Import your STL or OBJ file into the slicing software (e.g., PrusaSlicer, Cura, Simplify3D).
- Orient the Model: Position your object on the virtual build plate. Optimal orientation can reduce the need for supports, improve surface finish, and enhance strength.
- Set Layer Height: This determines the vertical resolution. Smaller layer heights (e.g., 0.1mm) yield finer details and smoother surfaces but increase print time. Larger layer heights (e.g., 0.2mm - 0.3mm) print faster but show more layer lines.
- Choose Infill Density & Pattern: Infill refers to the internal structure of the print. Higher infill (e.g., 80-100%) makes the part stronger but uses more material and time. Lower infill (e.g., 10-20%) is faster and lighter. Patterns (grid, honeycomb, gyroid) offer different strength characteristics.
- Add Support Structures: If your model has overhangs or bridges that cannot be printed without collapsing, the slicer will generate temporary support structures. These are removed after printing.
- Configure Print Speed & Temperatures: These settings are specific to the material you're using (e.g., PLA, PETG). Correct temperatures ensure proper layer adhesion and prevent issues like warping or stringing.
- Generate G-code: Once all settings are applied, the slicer will generate the G-code file, which is then sent to the 3D printer.
Warning: Incorrect slicing settings can lead to print failures (e.g., spaghetti, warped prints, weak parts). If using a professional service, they will handle these settings for you, optimising for their machines and materials.
Step 5: Select the Right 3D Printing Material for Your Project
The material you choose profoundly impacts the final properties of your 3D printed object, including its strength, flexibility, durability, and appearance. With a vast array of 3D printer filaments available, selecting the right one can seem daunting. However, understanding the common types and their characteristics will guide you to the best choice for your specific application.
Consider the environment your object will be in, the stresses it will endure, and any aesthetic requirements. For instance, a decorative item might be perfectly suited for PLA, while a functional part exposed to sunlight or impact might require PETG or ABS. PrintIn3D offers high-quality filaments from brands like Bambu Lab and SUNLU, ensuring you have access to reliable materials for your projects. We make it easy to buy 3d filament luxembourg and even offer options for 3d printer filament bulk buy luxembourg.
- PLA (Polylactic Acid):
- Characteristics: Easy to print, biodegradable, wide range of colours, good for aesthetic prints, prototypes.
- Best For: Models, display pieces, low-stress prototypes, educational projects.
- Considerations: Low heat resistance, can be brittle. Available for achat filament pla luxembourg.
- PETG (Polyethylene Terephthalate Glycol):
- Characteristics: Stronger and more flexible than PLA, good layer adhesion, food-safe (check specific filament), moderate heat resistance.
- Best For: Functional parts, mechanical components, outdoor use, watertight objects.
- Considerations: Can be prone to stringing, requires slightly higher print temperatures than PLA.
- ABS (Acrylonitrile Butadiene Styrene):
- Characteristics: High strength, impact resistance, good for mechanical parts, higher temperature resistance.
- Best For: Enclosures, automotive parts, functional prototypes.
- Considerations: Requires an enclosed printer to prevent warping, produces fumes during printing.
- TPU (Thermoplastic Polyurethane):
- Characteristics: Highly flexible, elastic, durable, good shock absorption.
- Best For: Gaskets, phone cases, wearables, flexible parts.
- Considerations: Challenging to print due to flexibility, slower print speeds.
- Other Advanced Filaments:
- Nylon: Very strong, durable, flexible, and wear-resistant.
- Polycarbonate (PC): Extremely strong, impact-resistant, high heat deflection.
- Composite Filaments: PLA or PETG infused with carbon fibre, wood, metal, etc., for enhanced properties or aesthetics.
Tip: When in doubt, start with PLA for initial prototypes due to its ease of use. Then, if your object requires specific mechanical properties, consider moving to PETG or more advanced materials. PrintIn3D offers competitive filament 3d prix luxembourg. You can find out more about various materials for Luxembourg projects here.
Step 6: Find Your Trusted 3D Printing Partner in Luxembourg (or the EU)
While DIY 3D printing is growing, for high-quality, reliable, and hassle-free results, especially for businesses and complex projects, partnering with a professional service impression 3d luxembourg is often the best choice. This is particularly true if you don't own a 3D printer, lack the technical expertise, or need to produce multiple iterations or larger quantities. A professional service handles all the intricacies of machine calibration, material handling, and post-processing, ensuring your vision is realised precisely as intended.
PrintIn3D stands out as a reliable and award-winning partner across the EU, offering custom 3D printing, design, and even 3D scanning services. We're recognized for our quality and customer support, making us an ideal choice for your impression 3d sur mesure luxembourg needs. Our expertise ensures your 2D sketch truly transforms into a high-quality 3D object.
- Expertise & Equipment: Look for a service with industrial-grade printers, experienced technicians, and a deep understanding of various materials and printing technologies.
- Material Selection: Ensure they offer the materials suitable for your project (e.g., PLA, PETG, ABS, TPU, composites).
- Quality & Precision: Review their portfolio or request samples to assess their print quality, surface finish, and dimensional accuracy.
- Turnaround Time: Confirm their typical lead times. Some services offer expedited options for urgent projects. PrintIn3D offers fast turnaround times and same-day dispatch for filament orders.
- Customer Support: Good communication, responsive support, and willingness to offer advice are invaluable. PrintIn3D prides itself on friendly WhatsApp support.
- Data Security: Especially for sensitive prototypes or designs, confirm if they offer Non-Disclosure Agreements (NDAs), as PrintIn3D does.
- Geographic Reach: For businesses in Luxembourg, an EU-based service like PrintIn3D ensures fast delivery and compliance with EU regulations.
Tip: Don't hesitate to ask for a consultation or clarification on their process. A reputable 3D printing service will be happy to guide you. Learn more about choosing your ideal service in Luxembourg here.
Step 7: Submit Your Design and Review the Quote
Once you've chosen your 3D printing partner, the next step is to submit your meticulously prepared 3D model and receive a detailed quote. This process is designed to be straightforward but requires careful attention to ensure all your project's specific requirements are accurately communicated and understood. A transparent quote will break down the costs associated with material, print time, and any additional services like design assistance or post-processing.
When you submit your file, you'll typically specify the desired material, colour, desired surface finish, and any other critical requirements. The service will then analyse your 3D model, calculate the material usage and estimated print time, and provide you with a comprehensive cost estimate. This is your opportunity to review everything before committing to the print.
- Upload Your 3D Model: Use the service's online platform to upload your STL or OBJ file. Ensure the file is correctly oriented and scaled. PrintIn3D offers an intuitive online submission process for custom 3D printing service online.
- Specify Material & Colour: Clearly state your chosen material (e.g., PLA, PETG) and the desired colour.
- Indicate Print Quality: If options are available, specify the desired layer height or print resolution (e.g., fine detail, standard, draft).
- Add Special Instructions: Include any notes on critical dimensions, surface finish requirements, specific areas needing extra strength, or if supports should be minimal.
- Review the Quote: Carefully examine the detailed quotation. It should clearly outline the cost per part, material cost, labour, and estimated delivery time. Don't hesitate to ask questions about any line item that isn't clear. Learn about the cost of custom 3d printing prototyping in luxembourg here.
- Confirm & Place Order: Once you are satisfied with the quote and all details, confirm your order.
Tip: For complex projects or multiple parts, consider requesting a breakdown of costs to understand where your budget is allocated. This can help in optimising future designs for cost-efficiency.
Step 8: Quality Control and Post-Processing of Your 3D Print
After your 3D print is completed, it's not always ready for immediate use. This step involves both a thorough quality check and any necessary post-processing to achieve the desired finish and functionality. Professional 3D printing services often include basic post-processing in their service, but it's important to know what to expect and what further steps you might need to take.
Quality control begins with inspecting the physical object against your initial design specifications. Check for dimensional accuracy, surface finish, and any visible defects. Post-processing can range from simply removing support structures to sanding, painting, polishing, or assembling multiple printed components. The extent of post-processing needed will depend on the material, print quality, and the final application of your object.
- Remove Support Structures: This is often the first step. Supports are temporary structures that prevent overhangs from collapsing. They can be snapped off, cut away, or dissolved, depending on the material and support type.
- Inspect for Defects:
- Layer Adhesion: Check if layers are well-bonded.
- Warping: Look for unintended bends or lifts, especially at the base.
- Stringing/Oozing: Small strings of plastic across gaps.
- Surface Finish: Assess for roughness, blemishes, or inconsistencies.
- Dimensional Accuracy: Measure critical features to ensure they match your design.
- Sanding & Smoothing: For a smoother surface, especially with FDM prints, sanding with progressively finer grits can reduce visible layer lines. Chemical smoothing (e.g., acetone vapour for ABS) can also be used, but requires caution.
- Painting & Finishing: If a specific colour or finish is required, the object can be primed, painted, and sealed. Acrylic paints are generally suitable for most 3D printed plastics.
- Assembly: If your object comprises multiple printed parts, this is the stage to assemble them using adhesives, fasteners, or snap-fit mechanisms.
- Cleaning: Remove any dust, debris, or residual material from the printing process.
Warning: Be gentle when removing supports, especially from delicate features, to avoid damaging the print. Always wear appropriate safety gear if performing chemical post-processing.
Step 9: Iterate and Improve – The Power of Prototyping
One of the most powerful advantages of 3D printing is its ability to facilitate rapid iteration. Your first print, especially of a new design, is rarely the final version. Instead, view it as a functional prototype, a tangible representation that allows you to test, evaluate, and refine your concept. This iterative process is crucial for optimising design, functionality, and manufacturability.
Once you've received and inspected your 3D printed object, put it through its paces. Does it fit correctly? Does it perform its intended function? Are there any weak points? Gather feedback, identify areas for improvement, and then go back to your 3D design software (or your 3D design service) to make adjustments. This cycle of design, print, test, and refine is what accelerates innovation and ensures you arrive at the best possible final product.
- Thorough Testing: Subject your printed object to its intended use conditions. Stress test it, check tolerances, and evaluate overall performance.
- Gather Feedback: Share your prototype with end-users, colleagues, or potential customers to collect valuable insights.
- Identify Areas for Improvement: Note down all observations, issues, and ideas for enhancement. These could relate to aesthetics, functionality, strength, or ease of assembly.
- Revise Your 3D Model: Based on your findings, modify your 3D CAD model. This might involve adjusting dimensions, strengthening weak points, optimising geometry, or refining surface details.
- Repeat the Process: Once revisions are made, generate a new G-code file (or resubmit to your printing service) and produce a new iteration. This cycle continues until you are completely satisfied with the result.
- Document Changes: Keep a detailed log of all design changes and their impact. This helps in understanding the design evolution and provides a valuable reference for future projects.
Tip: Don't be afraid to make significant changes between iterations. The beauty of 3D printing is that each new version is relatively quick and inexpensive to produce, allowing for extensive experimentation.
Common Mistakes to Avoid When Transforming 2D to 3D
Navigating the journey from a 2D sketch to a 3D printed object can be complex, and certain common pitfalls can lead to frustration, wasted materials, and delays. Being aware of these mistakes beforehand can help you ensure a smoother, more efficient process.
- Incomplete or Ambiguous 2D Designs: Rushing the initial sketch or technical drawing without clear dimensions, views, or functional descriptions can lead to misunderstandings and errors in the 3D model.
- Ignoring Scale and Units: Failing to consistently use correct units (e.g., mm vs. inches) or misinterpreting the scale can result in objects that are too large, too small, or simply incorrect.
- Creating Non-Watertight 3D Models: A 3D model with holes, inverted normals, or intersecting geometry will cause issues in the slicing software and lead to printing errors. Always check for watertightness.
- Neglecting Wall Thickness: Designing walls that are too thin for the chosen material and printing technology can result in fragile prints or failed sections. Most materials have a recommended minimum wall thickness.
- Overlooking Tolerances: When designing parts that need to fit together, failing to account for proper tolerances (small gaps) can lead to parts that don't fit or are too loose.
- Choosing the Wrong Material: Selecting a material solely based on cost or colour without considering the object's functional requirements (strength, flexibility, heat resistance) will lead to an unsuitable final product.
- Not Considering Print Orientation: The way an object is oriented on the print bed affects print time, strength, and the need for support structures. Suboptimal orientation can lead to weaker prints or excessive material waste.
- Underestimating Post-Processing: Assuming a print will come off the printer perfectly finished can lead to disappointment. Most prints require some level of cleaning, support removal, or smoothing.
- Skipping Test Prints: For complex or critical designs, failing to do smaller, faster test prints of specific features or problematic areas before printing the full object can be a costly mistake.
- Poor Communication with Your Service: If using a 3D design or printing service, unclear communication of your requirements or expectations can lead to results that don't match your vision.
FAQ: Your Questions About 2D to 3D Printing in Luxembourg Answered
What file formats does PrintIn3D accept for custom 3D printing?
For custom 3D printing, PrintIn3D primarily accepts standard 3D model file formats such as STL (.stl) and OBJ (.obj), which are universally compatible with 3D printers. If you have a different CAD format, we recommend converting it to STL or OBJ first. If you're using our 3d design service luxembourg, we can work with a wider range of input files and concepts, including 2D drawings, sketches, or even physical objects for 3D scanning.
How much does it cost to turn a 2D sketch into a 3D printed object, and what affects the price?
The cost varies significantly depending on several factors. These include the complexity of your 2D sketch (which affects création modèle 3d luxembourg time), the size and chosen material for the 3D print, the desired print quality, and any additional services like post-processing. For a detailed estimate, we encourage you to use our online quote system on our custom 3D printing service page, or contact us directly with your design details. We offer transparent pricing for filament 3d prix luxembourg and printing services. You can learn more about pricing here.
Can PrintIn3D help me if I only have a basic idea or a hand-drawn sketch?
Absolutely! That's precisely what our 3D design service is for. If you have a basic idea, a hand-drawn sketch, or even a detailed 2D technical drawing, our expert designers can transform it into a print-ready 3D model. We work closely with you to ensure your vision is accurately captured, providing you with a hassle-free journey from concept to reality. This is part of what makes us a leading entreprise impression 3d luxembourg for bespoke projects.
What is the typical turnaround time for a custom 3D print in Luxembourg?
Our turnaround times for custom 3D prints depend on the complexity, size, and quantity of your order, as well as the material chosen. For customers in Luxembourg, once the 3D model is ready for printing, we strive for fast production and efficient shipping across the EU. We also offer various expedited custom printing service options. For more precise estimates, please submit your design for a quote, or refer to our general shipping information for EU deliveries.
Do you offer 3D printer filament for sale to customers in Luxembourg?
Yes, we certainly do! PrintIn3D offers a wide range of high-quality 3D printer filaments, including popular types like PLA and PETG, from reputable brands such as Bambu Lab and SUNLU. We provide fast delivery for filament orders across the EU, including Luxembourg. Whether you need a single spool of achat filament PLA Luxembourg or are looking for a 3d printer filament bulk buy luxembourg, you can browse our selection and place your order directly on our website.
Next Steps: Bring Your Ideas to Life with PrintIn3D
You've envisioned it, sketched it, and now you know the steps to bring it into the physical world. Let PrintIn3D be your trusted partner in this exciting journey. Whether you need expert 3D design assistance, high-quality impression 3d sur mesure luxembourg, or premium 3D printer filaments, we're here to make your 3D dreams a tangible reality. Visit PrintIn3D.ie today to explore our services or get an instant quote for your custom 3D printing project. We look forward to partnering with you!