Find Your Ideal 3D Scanning Service in the USA
Your Ultimate Guide to Choosing a 3D Scanning Service in the USA
In a world increasingly driven by digital innovation, the ability to bridge the gap between physical objects and their digital counterparts is invaluable. This is precisely where 3D scanning comes into play. Whether you're an engineer looking to reverse-engineer a legacy part, a designer aiming to archive intricate sculptures, or a small business seeking to create custom 3D printed parts, a professional 3D scanning service USA can be your most powerful ally.
This comprehensive guide will walk you through everything you need to know about finding and utilizing the best 3D scanning service for your specific needs. From understanding the nuances of different scanning technologies to preparing your object for optimal results and making sense of the digital data, we'll cover it all. We understand that navigating the world of additive manufacturing and digital fabrication can seem complex, but with the right guidance, you can transform your physical concepts into precise, usable 3D models. By the end of this guide, you'll be equipped with the knowledge to confidently select an affordable 3d printing service usa or scanning partner, ensuring your projects are executed with precision and efficiency.
The demand for high-quality 3D data continues to grow across industries, from automotive and aerospace to art and medicine. Having an expert partner for 3D scanning and 3D printing can accelerate your product development, streamline quality control, and unlock new creative possibilities. Let's dive in and unlock the potential of 3D scanning for your next big project.
Who This Is For
- Small Businesses & Startups: Looking to reverse engineer components, create prototypes, or digitize existing products without investing in expensive scanning equipment.
- Engineers & Designers: Needing precise digital models for design iteration, inspection, or integration into CAD software.
- Manufacturers: Requiring accurate scans for quality control, tooling verification, or digital archiving of physical parts.
- Artists & Conservators: Seeking to digitize sculptures, artifacts, or historical objects for preservation, replication, or virtual exhibitions.
- Researchers & Educators: Utilizing 3D data for scientific analysis, educational demonstrations, or rapid prototyping projects.
- Anyone without a 3D Scanner: Who needs a high-fidelity digital representation of a physical object.
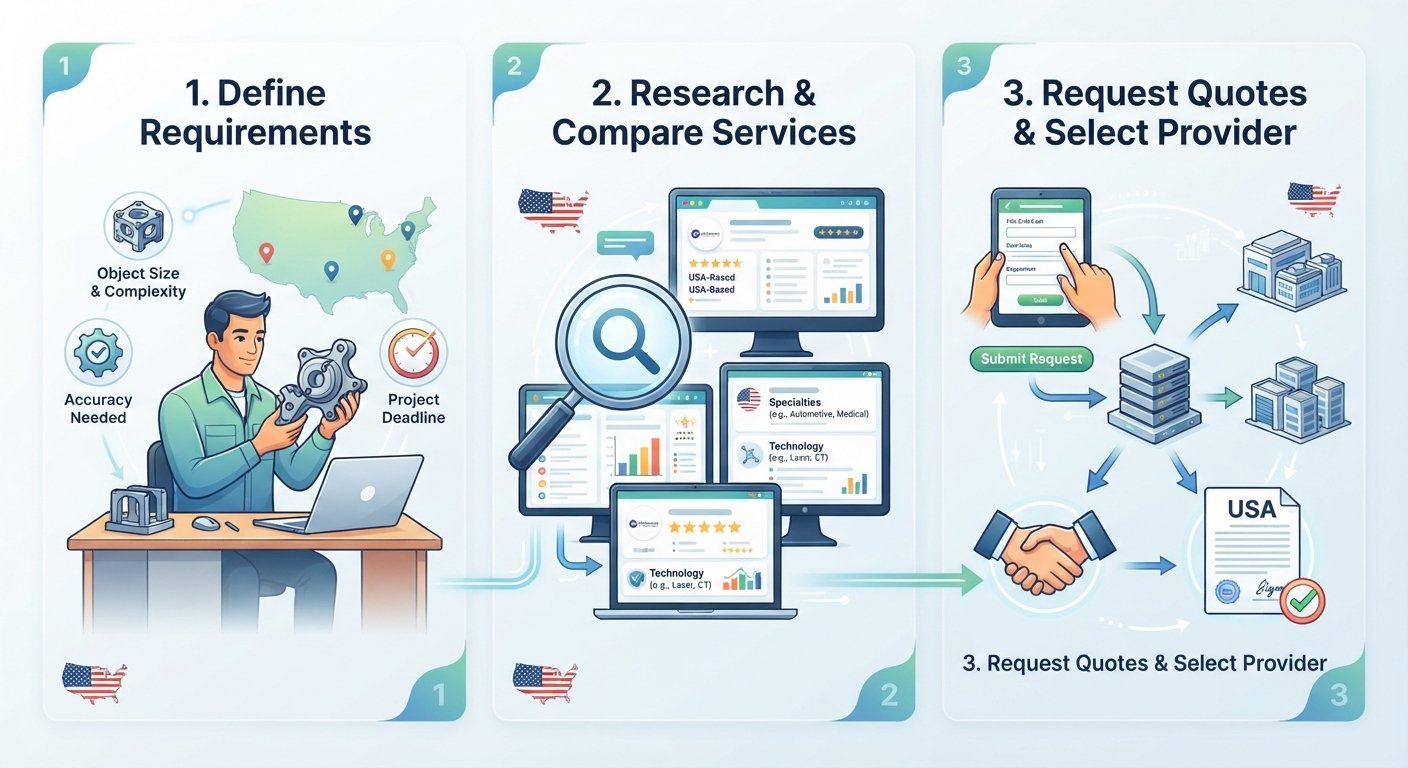
Step 1: Define Your 3D Scanning Project Needs and Goals
Before you even begin searching for a 3D scanning service USA, the most crucial first step is to clearly define what you need from the scan. A well-defined project scope will not only help you articulate your requirements to potential service providers but also ensure you get accurate quotes and the right results. Think of this as laying the groundwork for a successful collaboration.
Start by considering the object itself. What are its dimensions? Is it a tiny intricate jewelry piece or a large industrial component? What material is it made of – shiny metal, transparent plastic, soft fabric, or something else? These characteristics heavily influence the type of scanning technology and expertise required. Next, determine the purpose of the scan. Are you aiming for a highly accurate model for reverse engineering, where every dimension matters down to microns? Or do you need a less precise, textured model for visualization or archival purposes? The level of accuracy directly impacts the scanning method, time, and cost.
- Identify the Object(s):
- Size: Measure the maximum dimensions (length, width, height). Is it hand-held, desktop-sized, or larger than a car?
- Material: Note if the object is shiny, transparent, dark, highly reflective, or has very fine textures.
- Complexity: Does it have intricate details, deep recesses, sharp edges, or is it a relatively simple shape?
- Stability: Is the object rigid, or can it deform easily (e.g., fabric, rubber)?
- Determine the Purpose of the Scan:
- Reverse Engineering: Recreating a CAD model from an existing physical part for manufacturing or modification. This often requires high accuracy.
- Quality Inspection/Metrology: Comparing a physical part against its original CAD model to check for deviations or defects.
- Archiving/Documentation: Creating a digital record of an object for preservation or future reference.
- 3D Printing: Generating a mesh file (like STL or OBJ) to produce a physical replica using a 3D printing service.
- Digital Visualization/Animation: Creating models for virtual reality, video games, movies, or marketing materials, often requiring color and texture data.
- Prototyping: Quickly digitizing an existing prototype for further design iterations or to share with a 3d printing for small business usa.
- Specify Required Accuracy and Resolution:
- Accuracy: How close does the digital model need to be to the physical object? (e.g., ±0.05mm, ±0.5mm). This is often measured in microns (μm).
- Resolution: How fine do the details need to be captured? This relates to the density of the scan data points or polygons.
- Choose Desired Output File Format:
- Mesh Data: STL (Stereolithography), OBJ (Wavefront Object), PLY (Polygon File Format) are common for 3D printing, visualization, and general use.
- CAD Data: STEP (Standard for the Exchange of Product model data), IGES (Initial Graphics Exchange Specification), or native CAD files are required for reverse engineering or direct integration into CAD software like SolidWorks, Fusion 360, or Inventor. This often involves an additional "scan-to-CAD" service.
- Point Cloud Data: LAS, XYZ for raw scan data, often used in surveying or for large environments.
- Set Your Budget and Timeline:
- Having a realistic budget range will help filter out services that are either too expensive or too cheap to meet your quality demands.
- Define your required turnaround time. Rush services are often available but come at a premium.
Tip: Provide reference images or sketches of your object, especially if it's complex or unique. This helps the service provider understand your vision and provide a more accurate quote.
Step 2: Research and Identify Reputable 3D Scanning Service Providers in the USA
With your project requirements clearly outlined, the next step is to find a reliable 3d scanning service usa that can meet your needs. The market for 3D scanning is diverse, with providers offering various technologies, specializations, and service levels. Your goal is to find a partner, not just a vendor, especially if you anticipate ongoing needs for custom 3D printing service or design work after the scan.
Begin your search with online queries, focusing on your specific needs. For example, "industrial 3D scanning service California" or "art object 3D scanning New York." Look for companies that have a strong presence, clear descriptions of their services, and a professional website. Beyond basic searching, delve into industry forums, professional networks, and trade associations where users often share experiences and recommendations. Local business directories or chambers of commerce might also list relevant 3d printing for small business usa resources. Don't limit yourself to proximity if your object can be shipped; many excellent national services cater to clients remotely.
- Utilize Online Search Engines:
- Use keywords like "3d scanning service usa," "industrial 3d scanning," "metrology services," "reverse engineering 3d scan," "laser scanning services," or "structured light scanning" combined with your specific state or city if location is a factor.
- Look for an us 3d printing company that also offers scanning, as this can streamline your workflow for 3D printed parts manufacturing.
- Check Industry Directories and Associations:
- Websites like Thomasnet, Clutch, or specialized additive manufacturing directories list providers with expertise in various fields.
- Professional organizations related to manufacturing, engineering, or design may have member directories.
- Evaluate Experience and Specialization:
- Does the service provider have experience with objects similar to yours in terms of size, material, or complexity?
- Do they specialize in particular industries (e.g., aerospace, automotive, medical, cultural heritage)?
- Review their portfolio or case studies to see examples of their work and the quality of their output.
- Consider Technology and Equipment:
- Different scanners excel at different tasks. For high accuracy on small parts, structured light or blue light scanners are often used. For larger objects or outdoor environments, laser scanners are preferred.
- Ask about their specific equipment and how it aligns with your project's accuracy and resolution requirements.
- Read Reviews and Testimonials:
- Customer feedback on Google, Yelp, or industry-specific review sites can offer insights into a company's reliability, communication, and quality of work.
Warning: Be wary of services that offer unusually low prices without clear explanations of their process or capabilities. Quality 3D scanning requires expertise and expensive equipment, which is reflected in fair pricing.
Step 3: Prepare Your Object(s) for Scanning
Proper preparation of your physical object is paramount to achieving a high-quality 3D scan, regardless of the service provider you choose. Many common scanning issues, such as missing data, noise, or inaccuracies, stem from inadequate object preparation. Taking the time to do this correctly can save you significant time and cost in post-processing.
The core principle of object preparation is to make the surface as "scan-friendly" as possible. This often means addressing issues like reflectivity, transparency, and cleanliness. If your object is made of a shiny material like polished metal or clear plastic, it will scatter light in unpredictable ways, confusing the scanner's sensors. A matte, non-reflective surface allows the scanner to capture accurate geometric data. Similarly, ensuring the object is stable and free from debris guarantees that the scanner captures the object's true form, not dust particles or wobbles.
- Clean the Object Thoroughly:
- Remove all dust, dirt, grease, and fingerprints from the object's surface. Even small particles can appear as noise in the scan data, requiring tedious clean-up later.
- Use appropriate cleaning agents that won't damage the object's material or finish.
- Address Reflective or Transparent Surfaces:
- Shiny metals, polished plastics, and glass are challenging for most optical 3D scanners. They can cause light reflections that interfere with data capture.
- Apply a temporary, thin layer of matte scanning spray (often a white or grey powder) to create an even, non-reflective surface. Ensure the spray is easily removable and won't damage the object.
- For transparent objects, a similar matte coating is essential, as scanners typically cannot "see through" objects.
- Stabilize the Object:
- Ensure the object is firmly secured and won't move during the scanning process. Any movement, even slight vibrations, can lead to misalignments or blurred data.
- Use clamps, jigs, or non-damaging adhesive putty to hold the object in place, especially if it needs to be repositioned multiple times.
- Consider Disassembly (if applicable):
- If your object has internal features or complex geometries that are obscured, consider disassembling it into smaller components for individual scanning. This allows for a more complete dataset.
- Always document the disassembly process with photos to ensure proper reassembly.
- Prepare for Shipping (if remote service):
- If sending your object to a remote 3d scanning service usa, package it securely to prevent any damage during transit.
- Use adequate padding, sturdy boxes, and clearly label the package. Consider insurance for valuable items.
Tip: If you're unsure about preparation for a specific material or object, consult with your chosen 3D scanning service beforehand. They can offer expert advice and might even provide the necessary matte spray or setup assistance.
Step 4: Request Quotes and Detailed Consultations
Once you have a shortlist of potential 3D scanning service USA providers, it's time to engage with them directly. Requesting quotes and scheduling consultations is your opportunity to communicate your detailed project requirements, evaluate their understanding, and assess their professionalism. This interaction is crucial for ensuring transparency and avoiding misunderstandings down the line.
When reaching out, provide all the information you gathered in Step 1. The more details you offer, the more accurate and comprehensive the quotes will be. Don't hesitate to ask specific questions about their process, technology, and what's included in their service package. A reputable service provider will be happy to explain their methods, discuss potential challenges, and offer solutions. Pay attention to how quickly and thoroughly they respond, as this often indicates their level of customer service and commitment.
- Provide a Detailed Project Brief:
- Share all information from Step 1: object dimensions, material, purpose of scan, required accuracy, desired output format.
- Include images or videos of the object, if possible, to give them a visual reference.
- Inquire About Scanning Technologies:
- Ask which specific 3D scanning technology they recommend for your object and why (e.g., structured light, laser, photogrammetry, CMM).
- Understand the advantages and limitations of each technology in relation to your project.
- Discuss Deliverables and File Formats:
- Confirm the exact file formats you will receive (e.g., STL mesh, OBJ with texture, STEP CAD model).
- Clarify if post-processing services like mesh cleanup, watertight mesh creation, or reverse engineering into CAD are included or offered as separate services.
- For 3D design purposes from scan data, ensure they can provide the appropriate geometry.
- Clarify Pricing Structure:
- Understand if the quote is fixed, hourly, or based on object complexity/scan time.
- Ask about any additional costs: object preparation (spraying), rush fees, shipping, data storage, or revisions. Seek out an affordable 3d printing service usa and scanning combination.
- Request Turnaround Times:
- Get a clear estimate for when the scan data will be delivered.
- Inquire about options for expedited services if you have a tight deadline.
- Discuss Non-Disclosure Agreements (NDAs):
- If your object or project information is confidential, ensure the service provider is willing to sign an NDA. This is a critical step for intellectual property protection. (PrintIn3D offers NDAs for its services, highlighting the importance of this practice).
Warning: Be wary of vague quotes or services that are unwilling to provide detailed breakdowns. A professional service will be transparent about their pricing and process.
Step 5: Review Proposals and Select Your 3D Scanning Partner
After receiving multiple quotes and having consultations, it's time to meticulously review each proposal. This stage is about more than just comparing prices; it's about evaluating the overall value, reliability, and fit of each 3d scanning service usa for your project. Remember, the cheapest option isn't always the best, especially when precision and quality are paramount.
Lay out all the proposals side-by-side. Compare the specifics: what technology they propose, the promised accuracy, the included deliverables, and the estimated turnaround. Pay close attention to how each provider addressed your specific requirements and questions. Did they demonstrate a clear understanding of your project goals? Did their communication instill confidence? Consider their level of expertise and their track record, which you investigated in Step 2. Choosing the right partner at this stage will significantly impact the success and efficiency of your entire project, including subsequent 3D printing services.
- Compare Quotes Thoroughly:
- Don't just look at the bottom line. Compare what's included in each quote (e.g., raw scan data vs. cleaned mesh vs. CAD model).
- Note any additional fees or services that might be necessary for your project.
- Evaluate Technical Approach:
- Does their proposed scanning technology and methodology align with your required accuracy, resolution, and object characteristics?
- Ask for clarification if any technical details are unclear.
- Assess Communication and Expertise:
- Which provider demonstrated the clearest understanding of your project and communicated most effectively?
- Did they offer valuable insights or suggestions that enhance your project?
- Look for an us 3d printing company with a strong reputation for data integrity and precision.
- Review Sample Data (if available):
- If possible, ask for a sample scan file of a similar object they have processed. This can give you a tangible sense of their output quality.
- This is crucial for understanding the quality of the best 3d printer filament for beginners or advanced projects you might create after scanning.
- Check Contract Terms and Conditions:
- Read the fine print regarding intellectual property, data ownership, liability, and revision policies.
- Ensure the NDA is properly executed if one is needed.
- Make an Informed Decision:
- Weigh all factors—cost, quality, turnaround, communication, and trust—to make the best decision for your project.
- Confirm your selection in writing, ensuring all agreed-upon terms are documented.
Tip: Consider the long-term relationship. If you anticipate ongoing 3D scanning or 3D printing needs, choosing a partner you can build a consistent relationship with can be highly beneficial.
Step 6: Collaborate Actively During the Scanning Process
Once you've selected your 3D scanning service USA and the object is either onsite or shipped, your role shifts to active collaboration. While the technical work is now in the hands of the experts, maintaining open lines of communication and being available for clarifications can significantly contribute to the project's success and prevent potential delays. Think of yourself as an integral part of the team, even if you're not physically operating the scanner.
Good communication ensures that the service provider has all the necessary context and can address any unexpected challenges that arise. For instance, an object might have a feature that was not apparent in photos, or a specific area might require extra attention for accuracy. Your input during these moments is invaluable. Some services might provide progress updates or even preliminary scan data for your review, offering a chance for early feedback and adjustments before the final deliverables are prepared. This proactive approach minimizes revisions and ensures the final 3D model precisely meets your expectations for subsequent 3D printing services or design iterations.
- Maintain Open Communication:
- Respond promptly to any questions or requests for clarification from the service provider.
- Provide contact information for key decision-makers on your side.
- Provide Additional Context (if needed):
- If the service provider encounters an ambiguous area on the object, be ready to provide additional photos, dimensions, or explanations.
- Highlight any critical features or dimensions that are particularly important for your project's purpose.
- Review Progress Updates (if offered):
- Some services might provide interim scan data or progress reports. Take the time to review these carefully and provide constructive feedback.
- Early feedback can prevent larger issues from developing and ensures the scan is progressing as expected for 3d scanning and 3d printing workflows.
- Be Aware of Potential Challenges:
- Understand that even with the best preparation, unexpected issues can arise (e.g., small details being hard to capture, unexpected material properties).
- Trust your service provider's expertise in addressing these, but also be prepared to make informed decisions if options are presented.
- Confirm Final Deliverables:
- Before the final files are sent, reconfirm the desired output formats, accuracy requirements, and any specific naming conventions.
Tip: If your object is unique or particularly valuable, discuss the handling and security protocols with the service provider. A reputable 3d scanning service usa will have clear procedures in place.
Step 7: Receive and Utilize Your 3D Data
The moment you receive your digital 3D data is exciting! However, simply downloading the files isn't the end of the process. It's crucial to thoroughly review the delivered data to ensure it meets all your specifications and is ready for its intended use, whether that's custom 3D printing, reverse engineering, or digital archiving. This step ensures that the investment in a 3D scanning service USA truly pays off.
Start by opening the files in appropriate software to visually inspect the model. Look for any missing geometry, excessive noise, or areas that don't accurately represent the physical object. If you have specific accuracy requirements, you might use metrology software to perform detailed comparisons. Understanding the nuances of different file types, such as STL for meshes and STEP for CAD models, is also important for seamless integration into your workflow. If your goal is to create 3D printed parts manufacturer quality products, a clean and accurate scan is the foundation.
- Download and Organize Files:
- Carefully download all delivered files and organize them in a dedicated project folder.
- Ensure all agreed-upon file formats (e.g., STL, OBJ, STEP, IGES) are present.
- Perform Initial Visual Inspection:
- Open the 3D model in appropriate viewing software (e.g., MeshLab, 3D Viewer, your CAD software).
- Rotate and zoom in on the model from all angles to check for obvious errors, missing data, or significant deviations from the physical object.
- Look for excessive "noise" (random spikes or bumps) on smooth surfaces.
- Verify Accuracy (if critical):
- If high accuracy was a key requirement, use specialized metrology software (if available to you) to compare the scanned model against original CAD data or physical measurements.
- Confirm critical dimensions match your expectations.
- Check File Integrity and Usability:
- For 3D printing, ensure the mesh is "watertight" (no holes or non-manifold edges) if that was part of the service. Software like Netfabb or Meshmixer can help identify these issues.
- For CAD files, ensure they open correctly in your CAD software and maintain associativity if applicable.
- Integrate into Your Workflow:
- Begin using the 3D data for its intended purpose:
- Import into CAD software for reverse engineering or design modifications (often requiring 3D design services).
- Send to a 3D printing service for physical prototyping.
- Use in rendering software for visualizations.
- Archive the digital model for future reference.
- Begin using the 3D data for its intended purpose:
Warning: Do not assume the files are perfect without reviewing them. It's much easier and less costly to request revisions from the service provider within their specified revision period than to discover issues later in your product development cycle.
Step 8: Post-Processing and Refinement of 3D Data (Optional but Recommended)
While a good 3D scanning service USA will deliver high-quality data, often the raw or initial processed scan data isn't immediately ready for every application. Post-processing and refinement transform the scan data into a truly usable and optimized 3D model. This step is where raw point clouds or mesh data evolve into polished models suitable for specific engineering, design, or manufacturing workflows, especially if you plan on using various types of 3d printer filament.
The extent of post-processing depends heavily on your project's end goal. For simple visualization, minor cleanup might suffice. However, for critical applications like reverse engineering for manufacturing or high-precision metrology, significant effort in mesh optimization, surface reconstruction, or full CAD modeling from the scan data may be necessary. Many 3D scanning service providers also offer these post-processing capabilities, allowing for a seamless transition from scan to a fully engineered 3D design or print-ready file. This ensures that whether you're using PLA, PETG, or even ABS filament for 3d printing, your foundation is solid.
- Mesh Cleanup and Optimization:
- Noise Reduction: Remove stray data points or small imperfections that are not part of the original object.
- Hole Filling: Repair minor gaps or holes in the mesh that may occur during scanning (e.g., due to occlusion).
- Decimation/Remeshing: Reduce the polygon count while maintaining essential detail, making the file smaller and easier to work with without losing critical information, especially important for efficient custom 3D printing service.
- Smoothing: Smooth rough surfaces without losing sharp edges.
- Scan-to-CAD (Reverse Engineering):
- If your goal is to recreate a parametric CAD model from the scan data, this involves fitting geometric primitives (planes, cylinders, spheres, etc.) to the mesh data.
- This process is essential for manufacturing, design modification, or integrating the scanned part into a larger assembly in CAD software.
- Often requires specialized 3D design software and expertise, which many 3d scanning service usa providers also offer.
- Texture Mapping and Color Data:
- If the scanner captured color or texture information, this step involves aligning and mapping those textures onto the mesh for realistic visualization.
- Crucial for artistic, archival, or presentation purposes.
- Metrology and Inspection:
- Use the scan data to perform detailed comparisons against an original CAD model or engineering drawings.
- Generate deviation maps, cross-sections, or geometric dimensioning and tolerancing (GD&T) reports for quality control and inspection.
- Prepare for 3D Printing:
- Ensure the model is manifold (watertight) and has appropriate wall thickness.
- Consider orientation and support structures if you're preparing the file for your own best 3d printer filament for beginners or professional printer, or sending it to a 3D printed parts manufacturer.
Tip: Clearly communicate your post-processing needs to your 3D scanning service provider from the outset. Many offer comprehensive packages that include scanning and subsequent data preparation, potentially saving you time and ensuring seamless integration.
Common Mistakes to Avoid When Using a 3D Scanning Service in the USA
Even with the most reputable 3D scanning service USA, certain pitfalls can derail your project, leading to wasted time, increased costs, or unsatisfactory results. Being aware of these common mistakes can help you navigate the process more smoothly and ensure your investment yields the desired outcome. Prevention is always better than correction in the world of precise digital fabrication.
- Underestimating Object Preparation: Skipping or skimping on cleaning, degreasing, or applying matte spray to reflective/transparent surfaces is a frequent culprit for poor scan data. This leads to noise, incomplete data, and significant post-processing effort.
- Lack of Clear Requirements: Not clearly defining the project's purpose, required accuracy, desired output format (e.g., mesh vs. CAD), or specific critical features. Vague instructions lead to generic results that may not meet your needs.
- Choosing Solely Based on Price: Opting for the cheapest service without evaluating their experience, technology, or portfolio can result in low-quality scans, missed deadlines, or a lack of crucial post-processing. Quality and expertise for a 3d printing service in usa come at a fair cost.
- Ignoring Communication: Failing to maintain open lines of communication with the service provider can lead to misunderstandings, delays, and a final product that doesn't align with your vision. Always be available for questions.
- Neglecting NDAs for Sensitive Projects: Sending proprietary designs or confidential objects for scanning without a signed Non-Disclosure Agreement (NDA) puts your intellectual property at risk. Always ensure an NDA is in place.
- Not Reviewing Deliverables Promptly: Waiting too long to inspect the delivered 3D data can mean missing the window for requesting revisions or reporting issues, potentially leaving you with unusable files.
- Unrealistic Expectations: Expecting a perfect, print-ready CAD model from a raw scan without any additional post-processing (like reverse engineering). Scan data, especially mesh, often requires further work to become a functional CAD model for manufacturing.
- Forgetting About Scale or Units: Not specifying the correct units (mm vs. inches) or verifying the scale of the delivered model can cause significant issues when importing into CAD or preparing for 3D printing.
- Improper Packaging for Shipping: If you're sending your object to a remote service, inadequate packaging can lead to damage during transit, rendering the object unscannable or altering its dimensions.
FAQ
What is the typical cost of a 3D scanning service in the USA?
The cost of a 3D scanning service USA can vary significantly based on several factors, including the object's size and complexity, the required accuracy, the chosen scanning technology, and the desired output (e.g., raw mesh vs. fully reverse-engineered CAD model). Small, simple objects might range from $100-$500, while complex industrial parts or large objects requiring high accuracy and extensive post-processing could cost several thousands of dollars or more. Always request a detailed quote based on your specific project needs. For related services, an affordable 3d printing service usa will have transparent pricing.
How long does it take to get an object 3D scanned?
Turnaround times for a 3D scanning service USA depend on the same factors affecting cost: object complexity, size, required accuracy, and the service provider's current workload. A simple object might be scanned and processed within a few days, while a highly complex part requiring extensive post-processing (like scan-to-CAD) could take weeks. Many providers offer expedited or rush services for an additional fee. It's best to discuss your timeline upfront when requesting a quote.
What types of objects can be 3D scanned?
Modern 3D scanning technologies are incredibly versatile and can digitize a vast array of objects. This includes small intricate jewelry, industrial components, automotive parts, human bodies, architectural elements, historical artifacts, and even entire environments. However, certain materials like highly reflective (polished metal) or transparent (clear plastic, glass) objects require special preparation (e.g., matte scanning spray) to be accurately captured. Soft, deformable objects can also pose challenges.
What file formats will I receive from a 3D scanning service?
The most common file formats for 3D scan data are mesh files like STL (Stereolithography), OBJ (Wavefront Object), and PLY (Polygon File Format). STL is widely used for 3D printing and rapid prototyping. OBJ can include color and texture data, making it suitable for visualization and animation. For reverse engineering or integration into engineering workflows, service providers can often convert scan data into parametric CAD files like STEP, IGES, or even native formats for software like SolidWorks, though this usually involves an additional 3D design "scan-to-CAD" service.
Can I get a physical part from the 3D scan data?
Absolutely! One of the most popular applications of 3D scanning is creating physical replicas or prototypes through 3D printing. Once you have a clean, watertight mesh file (like an STL), you can send it to a 3D printing service or 3D printed parts manufacturer. Many 3d printing for small business usa companies combine scanning with printing services, offering a seamless workflow from physical object to digital model to new physical part. You can even choose various 3d printer filament types like Bambu Lab PLA, SUNLU PETG, or even ABS filament for 3d printing to suit your application.
Next Steps: Bringing Your Scans to Life with PrintIn3D
Now that you're well-versed in navigating the world of 3D scanning service USA, it's time to consider the exciting next steps. Whether you've captured a complex prototype, an intricate artwork, or an essential legacy component, your 3D scan data holds immense potential. From precise 3D design refinements to high-quality 3D printing services, PrintIn3D is your trusted partner in bringing these digital models to life. While we specialize in serving the EU/EEA with our award-winning services, our expertise in 3D design and 3D printer filament supply means we understand the entire workflow, from concept to creation. Don't let your scanned objects remain digital ghosts; let us help you turn them into tangible realities.