Prepare Your 3D Model for Printing: A US Maker's Guide
Introduction: Elevating Your 3D Designs to Professional Prints
As a US maker, designer, or small business owner, the journey from a brilliant 3D concept to a tangible, high-quality physical object is thrilling. However, creating a stunning 3D model is just the first step. To truly achieve professional-grade 3D prints, especially when leveraging a top-tier 3D printing service, meticulous preparation of your 3D model is absolutely crucial. This comprehensive guide is tailored specifically for you – the US maker – to navigate the intricacies of preparing your 3D models for flawless, hassle-free production.
Whether you're embarking on rapid prototyping 3d printing for a new product, crafting intricate artistic pieces, or producing functional parts, understanding the nuances of file preparation can save you time, money, and frustration. We'll delve into everything from initial design considerations to final file export, ensuring your model is optimized for the best possible outcome. By following these expert steps, you'll gain the confidence to submit your designs, knowing they are print-ready and poised for success, making your experience with any us 3d printing company seamless and satisfying.
Who This Is For
- US-based designers, engineers, and hobbyists
- Small businesses and startups utilizing 3D printing for prototypes or products
- Anyone looking to outsource their 3D printing to a professional service
- Individuals who want to understand the best practices for 3D model preparation
Step 1: Understand Your Printing Goals and Material Choices
Before you even begin the detailed preparation of your 3D model, it's essential to define your printing goals and the specific material you intend to use. These foundational decisions will heavily influence your design choices and the subsequent preparation steps. Are you aiming for a strong, functional prototype, a visually appealing display piece, or a flexible component? The answer to this question dictates the necessary material properties.
Professional 3D printing services offer a wide array of materials, each with unique characteristics. For example, PLA is popular for its ease of printing and biodegradability, making it an excellent choice if you're looking for eco friendly 3d printer filament for general prototyping. PETG, on the other hand, offers better strength, temperature resistance, and durability, often chosen for functional parts. If you need something exceptionally robust, you might even consider options from a carbon fiber filament supplier. Understanding these choices upfront ensures your design is optimized for the selected material's strengths and limitations.
- Define Purpose: Determine if your print is for aesthetics, functionality, fit testing, or mass production. This will guide material selection and tolerance requirements.
- Research Materials: Investigate the properties of different filaments like PLA, PETG, ABS, Nylon, or TPU. Consider strength, flexibility, temperature resistance, and surface finish. Many professional services are also a petg filament supplier usa, offering high-quality options.
- Consider Print Technology: Be aware that different 3D printing technologies (FDM, SLA, SLS) have varying capabilities and material compatibility. Most consumer-facing services focus on FDM.
Step 2: Optimize Your 3D Model's Geometry and Topology
The internal structure and external surfaces of your 3D model are paramount for a successful print. Professional printers require watertight, manifold meshes, meaning every edge must be shared by exactly two faces, and there should be no gaps or self-intersections. This step involves a meticulous review of your model in your CAD software or a dedicated mesh editing tool to ensure it's structurally sound and ready for slicing.
Complex designs with intricate details or extremely thin walls can pose significant challenges. It’s important to consider the limitations of 3D printing technology. While modern printers, like those used by a leading us 3d printing company, are incredibly capable, pushing the boundaries too far can lead to print failures or compromised structural integrity. Always design with the physical printing process in mind, aiming for a balance between detail and printability.
- Check for Watertightness: Ensure your model is a "solid" object without any open edges, holes, or disconnected surfaces. Tools like MeshMixer, Blender (with 3D Print Toolbox addon), or Netfabb are excellent for this.
- Remove Self-Intersections: Overlapping or intersecting geometry within your model can confuse the slicer and lead to errors. Clean up any such issues to create a clean, single volume.
- Address Non-Manifold Edges: Every edge should connect exactly two faces. More or fewer connections create non-manifold geometry, which can cause printing issues.
- Simplify Complex Geometry: For organic or highly detailed models, consider reducing polygon count where detail isn't critical, especially for FDM printing where overly fine details might not translate well.
Step 3: Account for Wall Thickness and Overhangs
Wall thickness and overhangs are two critical design parameters that directly impact the printability and structural integrity of your 3D model. Most 3D printing technologies have minimum wall thickness requirements, below which features may not print or will be extremely fragile. Similarly, overhangs – parts of your model that extend outwards without support below – need careful consideration, as gravity can cause them to sag or detach during printing.
When designing for a professional 3D printing service, you should ideally aim to minimize the need for extensive support structures. While supports can be removed, they often leave behind minor blemishes or require post-processing. A well-designed model integrates structural integrity into its form, reducing waste and improving surface finish. This foresight in your 3d design and 3d printing service preparation will contribute to a smoother process and higher quality final product.
- Minimum Wall Thickness: Research the minimum printable wall thickness for your chosen material and printer technology. As a general rule for FDM, aim for at least 1-2mm for robust parts. For smaller, delicate features, check with your service provider.
- Manage Overhangs: Design to minimize overhangs exceeding 45-60 degrees from the vertical, as these typically require support structures. Consider adding chamfers, fillets, or angling surfaces to be self-supporting.
- Bridge Length: Be mindful of unsupported horizontal spans (bridges). While printers can bridge small gaps, excessively long bridges will sag. Design short bridges or incorporate vertical supports.
Step 4: Prepare and Export Your File to the Correct Format
Once your 3D model's geometry is impeccable, the next crucial step is to prepare it for export into a format that 3D printers and slicing software can understand. The most common and widely accepted file format for 3D printing is the STL (STereoLithography) file. This format represents your 3D model as a series of interconnected triangles, forming the surface geometry.
While STL is ubiquitous, other formats like OBJ and 3MF are gaining traction, offering benefits such as color and material information. However, for a straightforward, single-color print, STL remains the gold standard. Ensuring your export settings are correct, particularly the resolution, is vital. A low-resolution export can result in a blocky, faceted print, while an excessively high resolution can create unnecessarily large files that are slow to process, without adding noticeable print quality. Many services, including PrintIn3D, offer a 3d model to stl conversion service if you're struggling with proprietary formats.
- Choose the Right Format: Most services primarily accept STL files. OBJ and 3MF are also common. Confirm with your 3d printing service what formats they prefer.
- Set Export Resolution: When exporting to STL, choose a fine enough resolution (often labeled as "high" or "fine" in your CAD software) to capture intricate details without creating an excessively large file. A chord height deviation of 0.01mm to 0.1mm is often suitable.
- Check Units: Ensure your model is exported in the correct units (millimeters are standard for 3D printing). Mismatched units can lead to your model being printed at an incorrect scale, turning a miniature into a massive object or vice-versa.
- Verify File Integrity: After export, briefly open the STL file in a viewer (like Windows 3D Viewer, MeshMixer, or a slicer software) to ensure it looks correct and hasn't introduced new errors.
Step 5: Consider Tolerances for Assembled Parts
If your 3D model consists of multiple parts designed to fit together, accounting for tolerances is absolutely critical. Unlike traditional manufacturing, 3D printing builds objects layer by layer, and this process, along with material shrinkage and printer accuracy, introduces slight inaccuracies. Without proper tolerances, interlocking parts will either not fit at all or will be too loose, defeating their functional purpose.
The required tolerance can vary significantly based on the printing material, the specific printer used by the us 3d printing company, and the desired fit (e.g., snap-fit, press-fit, or loose-fit). While some general rules of thumb exist, the best approach often involves empirical testing. This step is particularly vital for rapid prototyping 3d printing, where iterating on fit and assembly is common.
- Add Clearance: For parts designed to slide or snap together, add a small amount of clearance between mating surfaces. A common starting point for FDM is 0.2mm - 0.5mm, but this can vary.
- Test Fit Features: Design small test pieces that incorporate your critical fit features (e.g., pegs and holes, tongue and groove joints). Print these first to dial in the perfect tolerance.
- Chamfers/Fillets on Edges: Adding small chamfers or fillets to edges that will mate can help guide parts together and reduce the chance of binding, even with slight inaccuracies.
- Account for Material Shrinkage: Some materials (like ABS) have higher shrinkage rates than others. Factor this into your design, especially for larger parts. Your 3d printer filament supplier can provide data sheets with material properties.
Step 6: Assess Orientation and Support Requirements
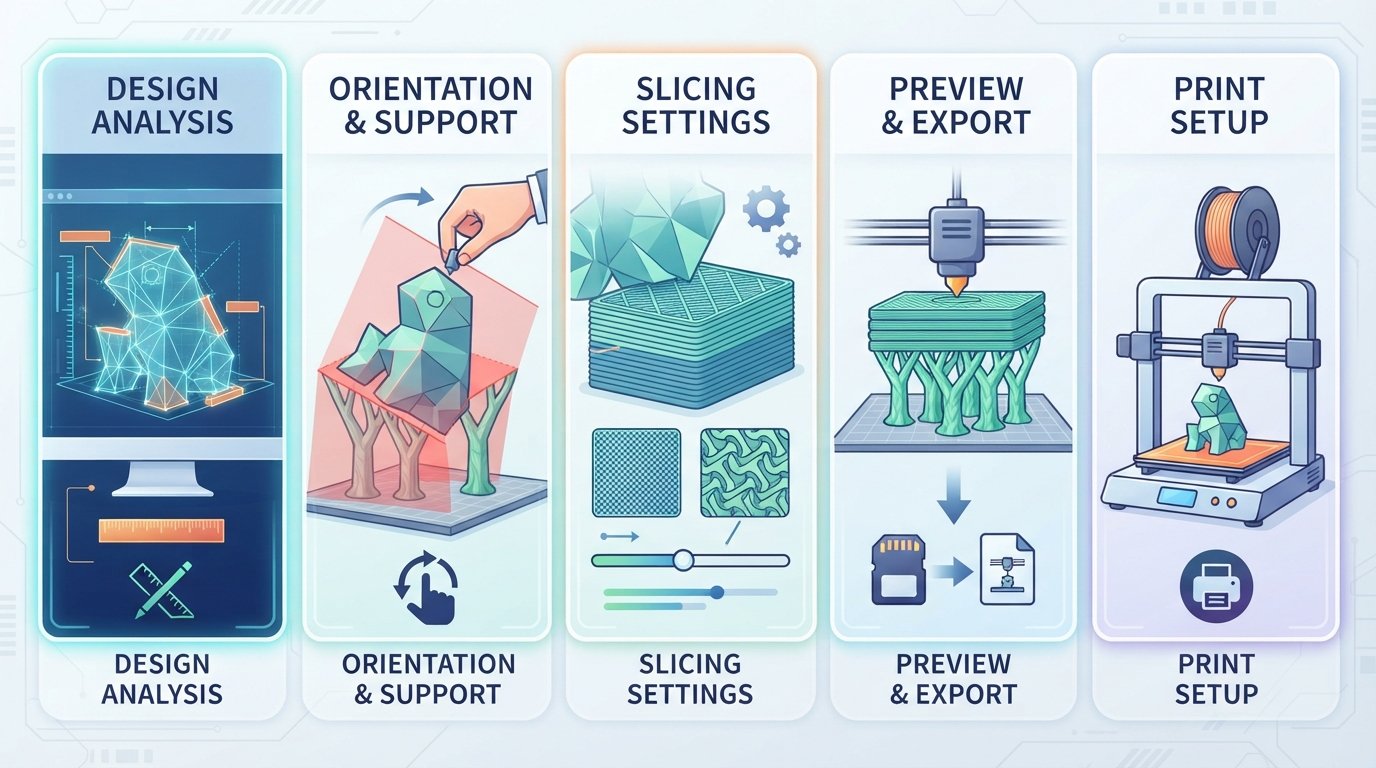
The orientation of your 3D model on the print bed significantly impacts print quality, strength, and the need for support structures. Choosing the right orientation can reduce printing time, minimize material usage for supports, and improve the surface finish of critical areas. This is where a professional 3D printing service's expertise truly shines, as they can optimize these settings for you, but understanding the basics helps you design better models.
Support structures are temporary additions that hold up overhangs and bridges during printing. While necessary for complex geometries, they can consume extra material and leave marks on the model's surface upon removal. Thoughtful design, coupled with optimal orientation, can often reduce or even eliminate the need for extensive supports, leading to a cleaner final product and a more efficient print from your us 3d printing company.
- Minimize Overhangs: Orient the model so that the largest or most critical flat surface is on the print bed to reduce the need for supports.
- Hide Support Marks: If supports are unavoidable, try to orient the model so that support structures are attached to non-visible or less critical surfaces.
- Strength Considerations: For FDM prints, objects are typically strongest along the X-Y plane (layers bonded together) and weaker along the Z-axis (between layers). Orient for maximum strength in critical directions.
- Stability: Ensure the model has a stable base when placed on the print bed to prevent wobbling or detachment during printing.
Step 7: Check for Mesh Errors and Repair Them
Even after carefully optimizing your geometry, mesh errors can sometimes creep in, especially when importing models from different software or performing complex operations. These errors can range from inverted normals (faces pointing inwards) to duplicate faces or stray vertices. While some slicers can automatically fix minor issues, relying on them is risky for professional prints. Proactively checking and repairing these errors ensures a robust and predictable printing process.
Dedicated mesh repair tools are invaluable for this step. They can identify and often automatically correct common mesh issues, transforming a problematic model into a print-ready file. Taking the time to perform these checks before sending your file to a 3d design and 3d printing service ensures that their machines spend less time processing errors and more time flawlessly producing your vision.
- Identify Inverted Normals: Normals dictate which side of a face is "out." Inverted normals can confuse slicers. Most 3D software or mesh editors have tools to visualize and flip normals.
- Remove Duplicate Faces/Vertices: Redundant geometry can lead to errors. Merge duplicate vertices and delete extraneous faces.
- Close Gaps/Holes: While you've checked for watertightness, a final sweep for tiny, overlooked gaps is good practice. Use mesh analysis tools to highlight boundaries.
- Use Mesh Repair Software: Tools like Netfabb (now part of Fusion 360), MeshMixer, or online services are designed specifically for automatically detecting and repairing common STL errors.
Step 8: Consider Aesthetics and Post-Processing
While the previous steps focused on printability, it's also important to consider the final aesthetic appeal and any required post-processing. The raw output of a 3D printer, particularly FDM, often has visible layer lines. Depending on your application and chosen material (e.g., an eco friendly 3d printer filament vs. a high-strength industrial blend), you might need to factor in additional finishing steps.
A professional 3d design and 3d printing service can often offer various post-processing options, from sanding and painting to vapor smoothing or polishing. Designing with these in mind can simplify the post-processing workflow. For example, avoiding overly complex geometries in areas that require heavy sanding can be a time-saver. Understanding the best 3d printer filament for beginners might influence your initial design choices if you're experimenting with finishes yourself before outsourcing.
- Surface Finish: Consider the desired surface finish. FDM prints will have visible layer lines, while SLA prints are much smoother. If a smooth finish is crucial, discuss post-processing options with your service.
- Color Considerations: If your print is multi-color, ensure your model is correctly segmented or prepared for multi-material printing. If single-color, think about how paint or dyes will adhere.
- Detail Resolution: Understand that extremely fine textures or embossed details might not be perfectly rendered, or may require specific printer settings or materials to achieve.
- Material Aesthetics: Some materials (like a matte PLA from a 3d printer filament supplier) inherently look different from others. Factor this into your visual design.
Common Mistakes to Avoid
- Ignoring Scale and Units: This is perhaps the most frequent and frustrating mistake. Always confirm your model's dimensions and export units are correct before sending.
- Non-Watertight Meshes: Models with holes, flipped normals, or disconnected surfaces are unprintable and will cause errors with slicing software.
- Insufficient Wall Thickness: Designing features that are too thin for the chosen material and printing technology will result in fragile, broken, or simply unprinted parts.
- Excessive Overhangs Without Support: Large, unsupported overhangs will sag or fail during printing, leading to deformation or print failure.
- Not Accounting for Tolerances: When designing multi-part assemblies, neglecting clearance between mating surfaces will lead to parts that don't fit together.
- Overly Complex Models for FDM: While powerful, FDM printers have limitations. Extremely fine details, sharp internal corners, or very tiny features might not resolve well.
- Choosing the Wrong Material: Selecting a material purely on cost without considering its functional properties (strength, flexibility, temperature resistance) for the application. If you need robust parts, don't just opt for the cheapest eco friendly 3d printer filament if it's not suited.
FAQ
What is the best file format for submitting my 3D model for professional printing?
The industry standard and most widely accepted file format is STL (STereoLithography). It defines the geometry of your 3D model using a tessellated mesh of triangles. Most professional 3D printing services, including PrintIn3D, prefer or require STL files. Other common formats like OBJ and 3MF are also supported by some services, often for models with color or texture information. If you have a different proprietary CAD file, consider using a 3d model to stl conversion service or exporting it from your design software.
How important is wall thickness in my 3D model?
Wall thickness is critically important. If parts of your model are too thin, they may not print correctly, or they will be extremely fragile and prone to breaking. Each material and printing technology has a minimum recommended wall thickness. For FDM printing, generally aim for at least 1-2mm for structural integrity. Always check the specific guidelines of your us 3d printing company or the chosen material to ensure your design is robust enough. This is a key aspect of successful rapid prototyping 3d printing.
Do I need to add support structures to my model before sending it to a 3D printing service?
Generally, no. Most professional 3d design and 3d printing services will handle the generation of support structures as part of their preparation process. They have specialized software and expertise to determine the optimal placement and density of supports for their specific printers and materials. Your focus should be on designing your model to minimize the need for supports where possible, by reducing steep overhangs, which will result in a cleaner print and less post-processing.
What if my model has errors, like holes or inverted normals? Will it still print?
Models with significant mesh errors, such as non-watertight geometry (holes, gaps), inverted normals, or self-intersections, are highly likely to cause problems during the slicing process or result in failed or flawed prints. While some advanced slicing software can attempt to automatically repair minor errors, it's best practice to ensure your 3D model is "watertight" and error-free before submission. Many tools like MeshMixer or Netfabb can help you identify and fix these issues, or you can leverage a professional 3d printing service's expertise in file preparation.
How do I choose the right filament for my project?
Choosing the right filament depends entirely on your project's requirements. Consider factors like desired strength, flexibility, temperature resistance, surface finish, and cost. For beginners or general prototyping, PLA is a popular choice for its ease of use and often being an eco friendly 3d printer filament. For functional parts requiring more durability, PETG is an excellent option (you can buy petg filament online from many suppliers). If you need extreme strength or specific properties, materials like ABS, Nylon, or even carbon fiber filament are available. Your 3d printer filament supplier or 3D printing service can offer guidance based on your specific application.
Next Steps: Bring Your Perfect Prints to Life
With your 3D model meticulously prepared, you're now ready to transform your digital design into a stunning physical reality. Don't let the complexities of owning and operating a 3D printer hold you back. Let a trusted 3d design and 3d printing service handle the manufacturing for you. Discover how easy it is to upload your model and get an instant quote for custom 3D printing today, or explore our expert 3D design services if you need assistance turning your concept into a print-ready file. For our US customers, find more answers to your questions at our dedicated US FAQ page.