Sketch to 3D Print: Your Guide to Design Services in Ireland
Have you ever looked at a sketch, a doodle on a napkin, or even a detailed drawing and wished you could hold it in your hands? Perhaps you've dreamt of a custom part, a unique piece of art, or a functional prototype that doesn't quite exist yet. In today's innovative world, turning those imaginative concepts into tangible, 3D printed objects is not just a fantasy – it's an accessible reality, especially with expert 3D design services available right here in Ireland.
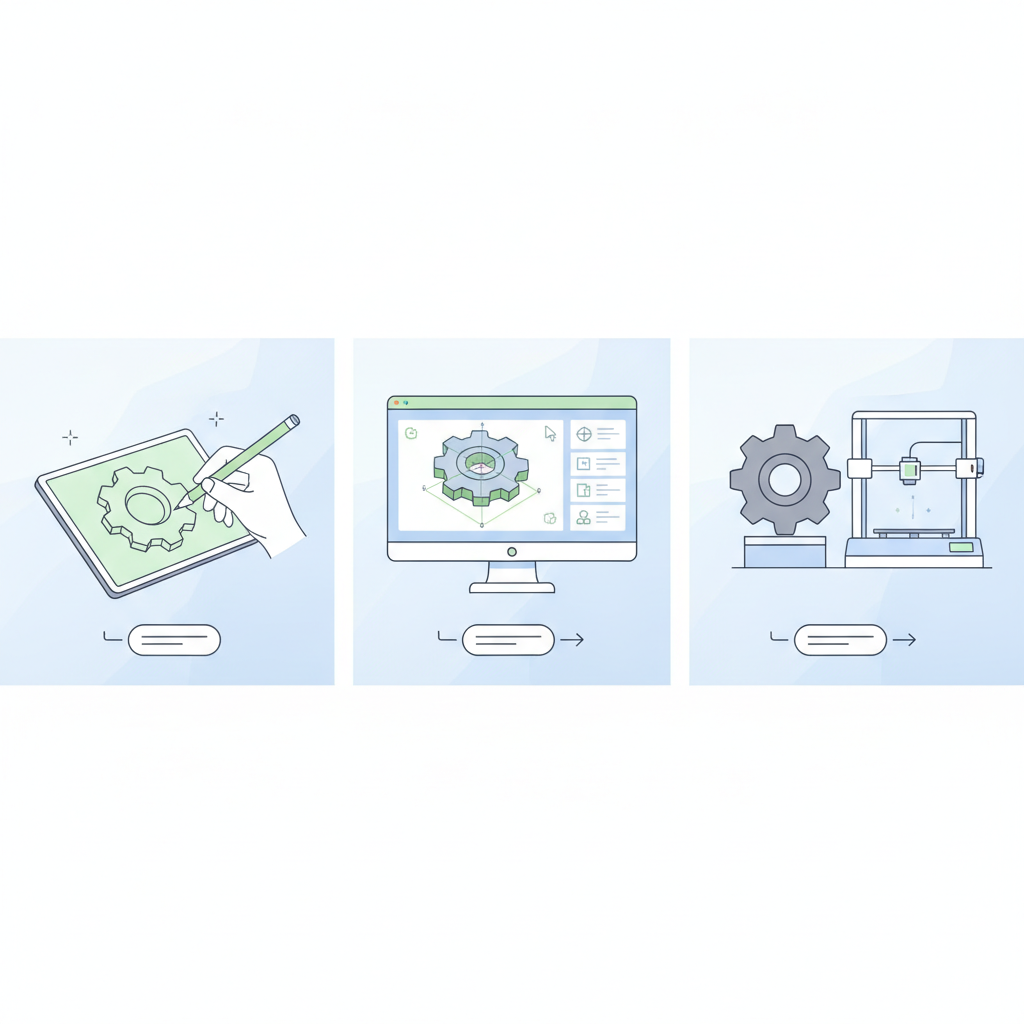
This comprehensive guide will walk you through every crucial step of transforming your initial sketch or concept into a fully realised, print-ready 3D model. We'll demystify the process, highlight the importance of professional design expertise, and show you exactly how a reliable partner like PrintIn3D.ie can streamline your journey from idea to physical object. Whether you're an inventor with a groundbreaking idea, a hobbyist needing a custom part, or a business looking for custom prototype manufacturing Ireland, understanding this pipeline is key to bringing your 3D dreams to life with confidence and precision.
Who This Is For
- Entrepreneurs and Start-ups needing rapid prototyping service Ireland.
- Engineers and product developers requiring 3D printed replacement parts service or custom components.
- Artists and designers wanting to transform 2D concepts into 3D art.
- Individuals with unique ideas for home improvements, gadgets, or gifts.
- Anyone without a 3D printer or CAD software expertise, looking for a hassle-free solution.
Step 1: Ideation & Initial Sketching – Giving Form to Your Vision
Every great 3D print begins with an idea. Before any digital modelling can commence, it's essential to solidify your concept as much as possible. This initial stage is all about brainstorming, sketching, and documenting your vision. Think of your sketch not just as a drawing, but as the blueprint for your future 3D object. The clearer and more detailed your initial thoughts, the smoother the entire design and 3D printing process will be.
Don't worry about perfection at this stage; focus on capturing the essence of your idea. Consider its purpose, how it will function, its approximate size, and any critical features. Visualise the object from different angles and try to represent these perspectives in your sketches. This groundwork will be invaluable when you communicate your ideas to a professional 3D design service.
- Start with Freehand Sketches: Use paper and pencil to draw your object from multiple viewpoints (front, side, top, isometric). Don't hold back; sketch all your ideas, even the imperfect ones.
- Annotate Your Drawings: Add notes to your sketches explaining specific features, desired dimensions, functionality, materials considerations (e.g., "needs to be flexible" or "must be rigid"), and any moving parts.
- Gather Reference Images: If your concept is inspired by existing objects or styles, collect pictures or examples that convey your aesthetic or functional requirements.
- Define the Problem/Solution: Clearly articulate what problem your 3D printed object will solve or what purpose it will serve. This helps in making design decisions down the line.
Tip: Even if you're not an artist, simple stick figures and basic shapes are perfectly fine. The goal is clarity of concept, not artistic mastery. The more information you can provide, the better your 3D designer can interpret your vision.
Step 2: Refining Your Concept for Digital Translation
Once you have your initial sketches and notes, the next step is to refine your concept into a more structured brief that can be easily translated into a digital 3D model. This involves thinking more critically about specific dimensions, tolerances, potential assembly, and the environment in which the object will be used. This is where you begin to bridge the gap between a freeform idea and a precise, manufacturable design.
Consider the practicalities. Will your object interact with other components? What forces will it be subjected to? These considerations will influence the choice of material and the structural integrity of the design. A well-prepared design brief minimises guesswork and revisions during the 3D modelling phase, ultimately saving time and resources.
- Add Specific Dimensions: Measure and add approximate or critical dimensions to your sketches. Even if they are rough, they provide a scale for the designer.
- Outline Functional Requirements: Detail how the object needs to function. Does it need to snap fit, hold weight, rotate, or withstand specific temperatures?
- Consider Assembly (if applicable): If your object is part of a larger assembly or consists of multiple 3D printed components, describe how they will fit together.
- Think About Material Properties: While you don't need to be an expert, have an idea of the desired characteristics. Do you need something strong, flexible, heat-resistant, or food-safe? This informs material selection later. For example, knowing you might need to buy flexible TPU filament Ireland will guide the design process from the start.
- List Aesthetic Preferences: Describe any specific textures, finishes, or visual styles you envision for the final product.
Warning: Avoid vague descriptions like "make it look cool" or "make it strong." Be as specific as possible about what "cool" or "strong" means in the context of your object. Precision in communication is paramount.
Step 3: Choosing the Right 3D Design Service in Ireland
This is arguably the most critical step for anyone who doesn't possess CAD (Computer-Aided Design) software expertise or access to professional designers. Selecting the right 3D design service means finding a partner who can accurately interpret your refined concept and transform it into a robust 3D print-ready model. In Ireland, PrintIn3D.ie stands out as a reliable and award-winning service, providing seamless solutions from initial idea to final print.
Opting for a professional service offers numerous advantages over attempting to learn complex CAD software yourself. Expertise in design ensures that your model is not only aesthetically pleasing but also structurally sound, optimised for 3D printing, and free from common pitfalls that can lead to failed prints or subpar quality. A good design partner can also advise on material selection and printing techniques, ensuring your product meets its intended purpose. If you're looking for a trusted CAD file to 3D print service, choosing a local Irish provider offers benefits in communication and understanding specific project requirements.
- Research Local Providers: Look for 3D printing Ireland companies that offer comprehensive 3D design services. Check their portfolios and client testimonials. PrintIn3D.ie, for instance, is recognised for its quality and customer service, including being a Rising Star at the Irish Print Awards.
- Evaluate Expertise: Ensure the service has experience with your specific type of project, whether it's custom prototype manufacturing Ireland, artistic models, or functional parts.
- Inquire About the Process: Understand how they handle client communication, revisions, and project timelines. A transparent process is key.
- Discuss Pricing and Turnaround: Get a clear understanding of how much does 3d printing cost Ireland, including design fees, and expected delivery times for both the design and the final print.
- Check for NDAs: If your idea is proprietary, ensure the service offers Non-Disclosure Agreements (NDAs) to protect your intellectual property. PrintIn3D.ie readily provides NDAs for client peace of mind.
Tip: When contacting a service, have your refined sketches, dimensions, and functional requirements ready. This allows them to provide a more accurate quote and project scope. For a deeper dive into our design process, check out our guide on From Sketch to Print: Your 3D Design & Printing Questions Answered.
Step 4: Collaborating with Your 3D Design Partner
Once you've chosen your 3D design partner, the real work begins. This phase is highly collaborative, where your vision starts to take shape in the digital realm. Effective communication with your designer is paramount to ensure the final 3D model perfectly matches your expectations and functional requirements. Think of your designer as an extension of your creative team, bringing their technical expertise to realise your concept.
Your designer will take your sketches and brief and begin building the 3D model using professional CAD software. They will likely provide you with initial renderings or digital prototypes for review. This is your opportunity to provide feedback, request adjustments, and clarify any details. Don't be afraid to ask questions or suggest changes; it's much easier and more cost-effective to make revisions at this stage than after printing has begun.
- Provide All Documentation: Share your sketches, dimensions, reference images, and detailed requirements with your designer. The more information, the better.
- Review Initial Concepts: Your designer will present initial 3D renderings or wireframes. Examine these carefully for accuracy in shape, size, and features.
- Give Clear, Constructive Feedback: When providing feedback, be specific. Instead of "it looks wrong," say "the curve on the left needs to be smoother," or "the hole diameter should be 5mm, not 6mm."
- Iterate and Refine: The design process often involves several rounds of revisions. Be patient and work closely with your designer to refine the model until it's perfect.
- Approve the Final Design: Once you are satisfied with the digital model, you will typically give final approval before it's prepared for 3D printing. This final approval signifies that the design meets all your criteria for a 3d printed replacement parts service or custom part.
Tip: Utilise video calls or shared screens to discuss revisions. This can be more efficient than email exchanges, as you can point directly to areas of the model and get immediate feedback. PrintIn3D.ie offers friendly WhatsApp support for quick communication throughout this process.
Step 5: From Digital Model to 3D Print-Ready File
Once your 3D model is finalised and you've given your approval, the designer will prepare it for the actual 3D printing process. This isn't just about saving the file; it involves a series of optimisations to ensure the model prints successfully, efficiently, and with the desired quality. This step transforms your beautiful digital creation into a format that a 3D printer can understand and execute.
The most common file format for 3D printing is STL (Stereolithography), though others like OBJ are also used. Before saving as an STL, the designer will check for common printing issues such as non-manifold edges, inverted normals, or excessive overhangs. They will also consider print orientation, support structures, and wall thickness to ensure structural integrity and a smooth printing experience. This technical preparation is crucial for avoiding printing errors and achieving a high-quality finished product, especially for custom prototype manufacturing Ireland projects.
- File Format Conversion: The 3D model will be converted into a mesh file format like STL or OBJ, which represents the object's surface using a collection of triangles.
- Mesh Optimisation: The designer will ensure the mesh is "watertight" (no holes or gaps) and free from errors that could cause printing problems.
- Wall Thickness Check: They will verify that all walls and features are thick enough to be printable and durable for their intended use.
- Tolerance Considerations: If your object needs to fit with other parts, appropriate tolerances will be applied to ensure a proper fit during assembly.
- Print Orientation & Supports: The designer might consider the best orientation for printing to minimise supports and maximise strength, or advise on support structure requirements.
Warning: Never skip this step or assume a raw CAD file is print-ready. Without proper preparation, even a perfect 3D model can result in a failed or low-quality print.
Step 6: Selecting the Perfect 3D Printing Material
With your 3D print-ready file in hand, the next critical decision is choosing the right 3d printer filaments. The material you select will profoundly impact the final object's properties, including its strength, flexibility, temperature resistance, aesthetics, and overall functionality. It's not just about colour; it's about matching the material to the application. A professional 3D printing service like PrintIn3D.ie can provide expert guidance on this choice.
Different 3D printer filaments offer distinct advantages. PLA (Polylactic Acid) is a popular choice for its ease of printing and wide range of colours, suitable for aesthetic models and prototypes. PETG offers more durability and temperature resistance, making it ideal for functional parts. For items requiring extreme flexibility, TPU (Thermoplastic Polyurethane) is the go-to material. Understanding these differences is key to achieving your desired outcome, whether you're creating a custom 3D printing Wexford piece or a rapid prototyping service Ireland part.
- PLA (Polylactic Acid):
- Pros: Easy to print, biodegradable, wide range of colours, good for aesthetic parts and general prototyping.
- Cons: Less heat resistant, more brittle than other plastics.
- Ideal for: Decorative items, visual prototypes, low-stress applications. PrintIn3D.ie offers various Bambu Lab PLA and SUNLU PLA filaments.
- PETG (Polyethylene Terephthalate Glycol):
- Pros: Strong, durable, good layer adhesion, temperature resistant, less brittle than PLA, often food-safe.
- Cons: Can be stringy, requires higher print temperatures.
- Ideal for: Functional parts, outdoor use, mechanical components, 3D printed replacement parts service. Check out our SUNLU PETG filament.
- TPU (Thermoplastic Polyurethane):
- Pros: Extremely flexible, high impact resistance, durable, abrasion resistant.
- Cons: Challenging to print, slow print speeds, can be stringy.
- Ideal for: Gaskets, flexible cases, impact-absorbing components, wearables. If you need to buy flexible TPU filament Ireland, we have options.
- Consult with Experts: Your 3D printing service will guide you based on your object's intended use and your budget.
Warning: Choosing the wrong material can compromise your object's functionality and lifespan. Don't base your decision solely on cost or colour; prioritise the material's properties for its intended application.
Step 7: The 3D Printing Process and Quality Control
With your perfected 3D print-ready file and chosen material, the stage is set for fabrication. This is where the magic of 3D printing truly happens, transforming digital data into a physical object layer by layer. A professional service like PrintIn3D.ie handles this complex process, leveraging advanced printers and experienced technicians to ensure your custom design is brought to life with precision and quality.
During this phase, the 3D printer meticulously builds your object. For FDM (Fused Deposition Modeling) printers, this involves melting and extruding plastic filament in thin layers, which then solidify and bond to the layer below. Quality control is paramount at every stage, from monitoring the print's progress to performing post-processing tasks. This meticulous approach ensures that your custom prototype manufacturing Ireland or unique part meets the highest standards.
- Slicing Software: The print-ready file is fed into "slicing" software, which converts the 3D model into a series of thin layers and generates toolpaths (G-code) for the 3D printer. This includes settings for infill, layer height, print speed, and support structures.
- Printer Setup: The chosen 3d printer filaments are loaded, and the printer is calibrated for optimal performance. High-quality printers, like the Bambu Lab machines used by PrintIn3D.ie, are essential for reliable results.
- Printing Commences: The printer heats up, lays down the first layer (which is crucial for bed adhesion), and then systematically builds the object layer by layer.
- In-Process Monitoring: Skilled technicians monitor the print for any issues like layer shifting, warping, or clogs, intervening if necessary to ensure a perfect print.
- Post-Processing: Once printing is complete, support structures are carefully removed, and the object may undergo additional finishing processes such as sanding, painting, or assembly to achieve the desired look and feel.
Tip: Understand that even with advanced equipment, some minimal post-processing (like support removal marks) might be visible. Discuss desired finish levels with your service provider upfront. At PrintIn3D.ie, we pride ourselves on fast turnaround times and meticulous quality control for all 3D printing services.
Step 8: Receiving and Evaluating Your 3D Printed Object
The final step in your journey from sketch to tangible object is receiving and evaluating your 3D printed creation. This is the moment where your initial concept fully comes to life, allowing you to hold, test, and admire the physical manifestation of your idea. A reputable 3D printing Ireland service will ensure your product is carefully packaged and dispatched, ready for your inspection.
Upon arrival, take the time to thoroughly inspect your new 3D printed object against your original concept, sketches, and agreed-upon specifications. This evaluation is crucial, especially for rapid prototyping service Ireland projects where functionality is key. Check for dimensional accuracy, surface finish, structural integrity, and ensure all features are present and correct. PrintIn3D.ie offers fast delivery across Ireland and the EU/EEA, ensuring your designs reach you quickly, backed by a 30-Day Risk-Free Return policy for peace of mind.
- Unpack Carefully: Handle your new 3D print with care, especially if it has delicate features or complex geometries.
- Visual Inspection: Examine the object from all angles. Check for any obvious defects, such as layer separation, warping, or blemishes.
- Dimensional Accuracy: If precise dimensions are critical, use calipers or a ruler to verify key measurements against your design specifications.
- Test Functionality: For functional parts or prototypes, test the object's performance in its intended environment. Does it fit correctly? Does it move as expected? Does it withstand the intended forces?
- Provide Feedback (if necessary): While professional services aim for perfection, if you encounter any issues, communicate promptly with your provider. PrintIn3D.ie values customer satisfaction and offers friendly WhatsApp support for any queries.
Tip: Keep your original sketches and design brief handy during evaluation. This makes it easier to compare the physical object with your initial vision and ensure all requirements have been met.
Common Mistakes to Avoid
- Vague Initial Concepts: Failing to clearly define your idea, dimensions, and functional requirements upfront can lead to costly revisions and delays during the 3D design phase.
- Ignoring Material Properties: Choosing a material based solely on cost or colour without considering its suitability for the object's intended use (e.g., using PLA for a high-stress mechanical part when PETG or a stronger 3d printer filaments is needed) will result in a failed product.
- Not Communicating Clearly: Poor communication with your 3D designer can lead to misinterpretations and models that don't match your vision. Be specific with your feedback and don't assume anything.
- Skipping Print-Readiness Checks: Attempting to print a raw CAD file or one not optimised for 3D printing can lead to failed prints, wasted material, and frustration. Always ensure the file is professionally prepared.
- Focusing Only on Cost: While how much does 3d printing cost Ireland is important, prioritising the cheapest option over quality and expertise can result in poor design, subpar prints, and ultimately, a wasted investment.
- Underestimating Turnaround Times: Especially for complex designs or custom prototype manufacturing Ireland, allow sufficient time for design, revisions, printing, and shipping. Rushing the process often compromises quality.
FAQ
How much does it cost to turn a sketch into a 3D print in Ireland?
The cost varies significantly depending on the complexity of your design, the level of detail required, the material chosen for 3D printing, and the print time. Simple designs might only require a few hours of 3D design work, while intricate mechanical parts could take much longer. Additionally, the amount of material and the size of the final print will influence the overall how much does 3d printing cost Ireland. At PrintIn3D.ie, we provide transparent quotes based on your specific project requirements after reviewing your concept. For a detailed breakdown, you can check our Custom 3D Printing & Design Costs in Ireland FAQ.
What file formats do I need to provide for 3D design services?
Ideally, you start with sketches, drawings, or even just a clear description of your concept. Our 3D design service can work from almost anything! If you have existing 2D CAD files (like DWG or DXF) or even images with dimensions, those are also helpful. Our goal is to take your input and convert it into a 3D print-ready file, typically an STL or OBJ, which is compatible with 3D printing.
How long does the entire process take from sketch to final 3D print?
The timeline depends on several factors: the complexity of your design, the number of revisions needed during the 3D design phase, the chosen material, and the size of the print. A simple object might take a few days, while a complex custom prototype manufacturing Ireland project could take weeks. We pride ourselves on fast turnaround times, offering various rapid prototyping service Ireland options, and will provide an estimated timeline with your quote. We aim for efficiency without compromising on quality for all 3D printing Ireland orders.
Can I get a custom 3D printed replacement part from a broken object?
Absolutely! This is a common and highly effective application of our services. If you have a broken part, you can provide us with the remaining pieces or even a sketch with dimensions. We offer 3D scanning services to accurately capture the geometry of an existing object, or our designers can recreate the 3D printed replacement parts service from scratch based on your input. This is an excellent way to extend the life of appliances, toys, or industrial equipment.
What if I need a very specific material, like one that is flexible or transparent?
PrintIn3D.ie offers a wide range of 3D printer filaments, including common materials like PLA and PETG, as well as specialised options. If you need flexibility, we offer options to buy flexible TPU filament Ireland. For specific needs like transparency, strength, or heat resistance, our team will advise you on the best available material to match your project's requirements. We work with high-quality Bambu Lab and SUNLU filaments to ensure optimal results.
Next Steps
Ready to turn your sketches and concepts into tangible 3D printed realities? Let PrintIn3D.ie be your trusted partner. Visit our 3D Design service page or our Custom 3D Printing page to submit your idea and get a hassle-free quote today!