Mastering 3D Scans: Your Complete Guide to Digital Replication & 3D Printer Filaments
Introduction: Unlocking the World of 3D Scans
Imagine being able to replicate any physical object, preserve a delicate antique, or create a perfect digital twin for design modifications. This isn't science fiction; it's the power of 3D scanning. In today's rapidly advancing world, 3D scans are revolutionising industries from engineering and manufacturing to art, archaeology, and even personal customisation. Whether you're an engineer looking to reverse-engineer a legacy part, a hobbyist wanting to duplicate a beloved toy, or a business needing to digitise prototypes for custom 3d printing services Ireland, understanding 3D scanning is an invaluable skill.
This comprehensive guide will walk you through the entire process of performing and utilising 3D scans. We'll demystify the technology, provide actionable steps from preparation to post-processing, and show you how these digital models seamlessly integrate with 3D printing, enabling you to bring your digital creations back into the physical world using high-quality 3d printer filaments like PLA and PETG. By the end, you'll have a clear understanding of how to transform real-world objects into digital assets, ready for design, analysis, or physical production. Get ready to unlock new possibilities and see the world in three dimensions!
Who This Is For
- Engineers and product designers needing to digitise parts or create prototypes.
- Hobbyists and makers wanting to replicate objects or create custom accessories.
- Artists and sculptors looking to digitise physical artwork.
- Architects and construction professionals for site modelling and historical preservation.
- Anyone interested in creating custom Etsy 3D printed products Ireland from real-world items.
- Businesses seeking 3d printed replacement parts service or custom fabrication.
- Individuals curious about the process of transforming physical objects into digital models.
Step 1: Understanding 3D Scanning – The Foundation
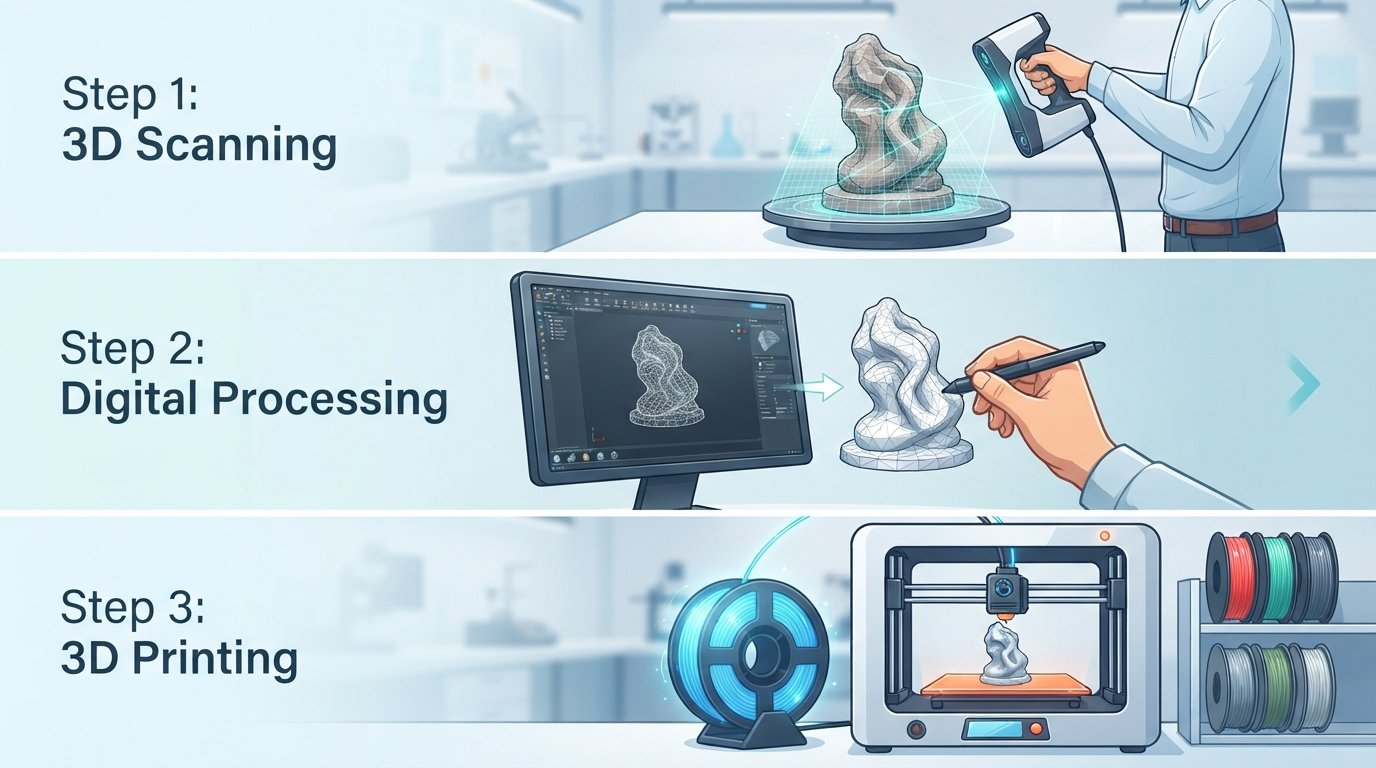
Before you even think about pointing a scanner, it's crucial to grasp the fundamental principles of 3D scanning. At its core, 3D scanning is the process of analysing a real-world object or environment to collect data on its shape and appearance, then constructing a digital three-dimensional model from that data. This digital model, often a "point cloud" or a "mesh," serves as a virtual replica of the original.
There are several types of 3D scanning technologies, each with its own strengths and ideal applications. Knowing these will help you choose the right approach for your project, whether you're performing the scan yourself or engaging a professional 3d scanning service in Ireland. The two most common types for small to medium objects are structured light and laser scanning, but photogrammetry (using photographs) is also widely accessible.
- Structured Light Scanning: Projects a known light pattern (e.g., stripes or grids) onto the object. A camera captures the deformation of this pattern, and software calculates the object's surface geometry. It's typically fast and accurate for intricate details.
- Laser Scanning: Emits a laser beam or line onto the object. A sensor then measures the distance to the surface, building up a dense cloud of points. Handheld laser scanners offer flexibility, while tripod-mounted ones are great for larger areas.
- Photogrammetry: Uses multiple 2D photographs taken from different angles to create a 3D model. While it can be very cost-effective and doesn't require specialised hardware beyond a good camera, it's generally less precise for fine details and requires significant post-processing.
- Contact Scanning (CMMs): Uses a physical probe to touch the object's surface and record coordinates. Extremely accurate but slow and primarily used in industrial quality control.
Understanding these methods will help you appreciate the data you'll be working with and set realistic expectations for accuracy and detail.
Tip: For beginners or those with occasional needs, engaging a professional 3D scanning service often provides superior results without the upfront investment in costly equipment and software. They have the expertise to select the best technology for your specific object and requirements.
Step 2: Preparing Your Object for a Flawless Scan
Just like a painter prepares their canvas, a 3D scanner needs a well-prepared subject. Proper object preparation is paramount to achieving a high-quality 3D scan, regardless of the technology you use. Skipping this step can lead to incomplete data, noise, and inaccuracies that are difficult to fix later.
The goal is to ensure the scanner can "see" and accurately measure the object's surface. Certain material properties can interfere with scanning, so addressing these beforehand is critical. This stage also includes setting up your scanning environment to minimise external disruptions.
- Clean the Object: Dust, dirt, grease, or any surface contaminants can create erroneous data points or obscure fine details. Use appropriate cleaners for the material, ensuring it's completely dry before scanning.
- Handle Challenging Surfaces:
- Shiny/Reflective Surfaces: These can scatter laser light or structured patterns, making it hard for the scanner to accurately capture geometry. Apply a thin, even layer of matte scanning spray or talcum powder.
- Transparent/Translucent Objects: Glass, clear plastics, and very thin materials are often invisible to many scanners. Again, a matte spray is usually necessary to give the scanner a surface to read.
- Dark/Black Objects: Some scanners struggle with very dark surfaces, which absorb too much light. A light dusting of talcum powder can help.
- Stabilse the Object: Ensure the object is perfectly still and stable throughout the scanning process. Use clamps, stands, or a turntable (if your scanner supports it) to prevent movement.
- Control the Environment:
- Lighting: For structured light scanners, consistent, indirect lighting is best. Avoid direct sunlight or strong spotlights that can interfere with projected patterns. For photogrammetry, even, diffuse lighting is crucial to avoid harsh shadows.
- Background: A plain, contrasting background can help the scanner focus on the object and simplify data cleanup. Avoid cluttered backgrounds.
- Vibrations: Ensure your scanning area is free from vibrations that could cause the object or scanner to shift during data capture.
Warning: Always test scanning sprays on an inconspicuous area first, especially with delicate or antique items, to ensure they don't damage the surface. If in doubt, consult a professional scanning service.
Step 3: Choosing the Right 3D Scanner & Software for Your Needs
The choice of 3D scanner and accompanying software depends heavily on your specific project requirements, budget, and technical expertise. This step guides you through evaluating your needs and deciding whether to invest in equipment or outsource to experts offering 3d printing services that often include scanning.
For DIY enthusiasts, entry-level handheld scanners or photogrammetry software paired with a good camera are popular options. Businesses, however, might need industrial-grade scanners for precision and speed, often justifying professional services. Consider factors like accuracy, resolution, speed, and the size of objects you intend to scan regularly.
- Define Your Requirements:
- Accuracy: How precise does the scan need to be (e.g., for engineering vs. artistic replication)?
- Resolution: How much detail do you need to capture (e.g., fine textures vs. overall shape)?
- Object Size: Will you scan small figurines, medium-sized parts, or large architectural elements?
- Material: Are you scanning reflective, transparent, or dark objects (as discussed in Step 2)?
- Budget: What's your financial limit for hardware, software, and training?
- Research Scanner Types: Based on your requirements, delve deeper into specific structured light, laser, or photogrammetry systems. Read reviews, watch tutorials, and compare specifications.
- Evaluate Software:
- Scanning Software: Often proprietary to the scanner, this software controls the hardware and captures the raw data.
- Post-Processing Software: Programs like MeshLab, Blender, Geomagic Wrap, or even advanced CAD software are used for cleaning, optimising, and converting scan data. Look for features like noise reduction, hole filling, mesh simplification, and texture mapping.
- Consider Professional Services: If purchasing equipment is too costly, or if you need highly accurate scans for complex projects like 3d product design services Ireland, a professional 3D scanning provider like PrintIn3D.ie can offer expert solutions, often with faster turnaround times and superior results. This is especially true for demanding applications like a 3d body scanning service, which requires specialised equipment and expertise.
Tip: Many professional services can not only perform the scan but also assist with post-processing, file optimisation, and even direct 3D printing of your scanned object using various 3d printer filaments. This can be a significant advantage, especially for businesses in areas like 3d printing Dublin.
Step 4: Executing the Scan – Capturing the Data
With your object prepped and your equipment ready, it's time for the core activity: data acquisition. This step involves carefully operating your chosen 3D scanner to capture comprehensive data of the object's surface. The key here is consistency and thoroughness to avoid missing areas or introducing errors.
The specific technique will vary depending on your scanner type. Structured light scanners usually involve taking multiple "shots" from different angles, while handheld laser scanners require a smooth, continuous sweeping motion. Photogrammetry demands meticulous photo-taking from a wide range of positions. Regardless of the method, the goal is to cover every visible surface of your object.
- Follow Manufacturer Guidelines: Every scanner has its optimal operating distance, speed, and calibration procedure. Adhere strictly to these instructions to ensure the best possible data quality.
- Establish a Scanning Path:
- Structured Light: Position the object on a turntable or manually rotate it, taking overlapping scans from every angle. Ensure at least 30-50% overlap between consecutive scans for accurate alignment.
- Handheld Laser: Start from a distinct feature and sweep the scanner smoothly over the surface, maintaining a consistent distance. Overlap your passes generously.
- Photogrammetry: Take a multitude of photos (hundreds for complex objects) from all angles, ensuring clear overlap. Use a consistent f-stop and shutter speed to maintain depth of field and prevent blur.
- Monitor Data Capture: Most scanning software provides real-time feedback. Look for areas where data might be sparse or missing, indicated by gaps or "holes" in the preliminary model. Immediately rescan these areas.
- Use Registration Markers (If Applicable): For complex or large objects, some scanners use small, adhesive markers placed on the object's surface to help the software align individual scans accurately. Ensure these markers are not obscured and are adequately spaced.
- Stay Consistent: Maintain steady hands for handheld scanners, and consistent rotation for turntable setups. Any sudden movements or changes in distance can introduce errors.
Warning: Rushing the scanning process almost always leads to incomplete or poor-quality data, requiring more time-consuming post-processing or even a complete rescan. Take your time and be thorough.
Step 5: Post-Processing Your Raw Scan Data
Once you've captured all the raw data, it's rare to have a perfect, ready-to-use 3D model. The next crucial step is post-processing, where you clean up the raw scan data, align multiple scans, and transform the noisy point cloud into a clean, watertight mesh. This is where the digital magic truly happens, refining your 3d scanning in Dublin data for usability.
Post-processing involves a series of operations typically performed using specialized software. This stage is critical for ensuring the final model is accurate, smooth, and suitable for its intended purpose, whether for 3d printing, CAD integration, or digital archiving.
- Import and Review Data: Load all your individual scan files into your post-processing software. Perform an initial visual inspection to identify obvious errors, missing areas, or excessive noise.
- Align Multiple Scans (Registration): If you took multiple scans from different angles, you'll need to align them into a single, cohesive model. Most software offers automated or manual registration tools.
- Automated Alignment: Uses algorithms to find common features or targets (like markers) to stitch scans together.
- Manual Alignment: You might need to pick common points on overlapping scans to guide the software, especially for complex geometries or if automated methods fail.
- Merge Scans: Once aligned, merge the individual scans into a single point cloud or mesh. This consolidates all the captured data.
- Clean Up Noise: Raw scan data often contains "noise" – stray data points floating away from the object's surface, or jagged edges. Use filtering tools to remove outliers and smooth the surface without losing important detail.
- Fill Holes: Areas that the scanner couldn't reach (e.g., undersides, deep crevices, or small missed patches) will appear as holes in the mesh. Use hole-filling algorithms to intelligently patch these gaps, ensuring the model is "watertight" for 3D printing.
- Decimate/Simplify Mesh: Scanned models can have an extremely high polygon count, making them cumbersome to work with. Use decimation tools to reduce the number of polygons while preserving overall shape and critical detail, optimising the file size without significant visual loss.
Tip: Always save your project at different stages of post-processing. This allows you to revert to an earlier version if a particular operation yields undesirable results.
Step 6: Refining & Optimising Your 3D Model
After the initial clean-up, your 3D model is likely in good shape, but often it benefits from further refinement and optimisation to meet specific requirements. This step focuses on fine-tuning the mesh, preparing it for specific applications like 3D printing, or integrating it with CAD software.
Refinement can involve smoothing surfaces, ensuring dimensional accuracy, and making the model "watertight" – a crucial characteristic for successful 3D printing. This stage also addresses aesthetic concerns and ensures the model is lightweight enough for easy sharing and manipulation.
- Smooth Surfaces: Apply smoothing algorithms to remove any remaining jaggedness or minor imperfections on the surface, creating a more aesthetically pleasing or functionally correct model. Be careful not to over-smooth and lose crucial details.
- Ensure Watertightness: For 3D printing, a model must be "watertight," meaning it has no open edges or holes, and its volume is completely enclosed. Check your model for any remaining non-manifold edges or holes and repair them using dedicated tools.
- Align to Coordinate System: Orient your model correctly within the 3D space. For example, align it to a standard XYZ axis if it needs to be integrated into CAD designs or prepared for specific manufacturing processes.
- Scale and Units: Verify that the model is at the correct scale and units (e.g., millimetres, inches). Scanners can sometimes capture data in arbitrary units, so adjust as necessary to match your real-world dimensions.
- Add Textures/Colours (Optional): If your scanner captured colour or texture data, you can apply these to the mesh. This is vital for realistic renderings or applications where visual fidelity is important, such as creating models for Etsy 3D printed products Ireland that require visual appeal.
- Review and Validate: Perform a final review of the model for any overlooked issues. Some software includes tools to analyse mesh quality, check for self-intersections, and validate suitability for various applications.
Warning: While decimation reduces file size, excessive simplification can lead to a loss of critical fine details. Always balance file size reduction with the necessary level of detail for your project.
Step 7: Exporting and Utilising Your Scan Data
With your 3D model perfectly refined, the final step in the scanning process is to export it in the appropriate file format and put it to use. The choice of export format depends entirely on what you plan to do with the digital twin, whether it's for 3D printing, CAD design, animation, or web display.
The beauty of 3D scans lies in their versatility. A single scanned object can serve as the foundation for multiple projects, from creating a 3d printed replacement parts service to generating complex assemblies or even serving as a reference for a new product design. This stage is where your initial investment of time and effort truly pays off.
- Choose the Right File Format:
- STL (.stl): The most common format for 3D printing. It represents the surface geometry using a mesh of triangles. Ensure your model is watertight before exporting to STL.
- OBJ (.obj): A versatile format that can store geometry, colour, and texture information. Often used in 3D graphics, animation, and sometimes for 3D printing with colour.
- PLY (.ply): Another format for storing 3D data, including colour and texture. Commonly used for raw point cloud data and sometimes for mesh data.
- FBX (.fbx) / GLTF (.gltf): Popular in game development and real-time 3D applications, supporting geometry, textures, animations, and more.
- STEP (.stp) / IGES (.igs): These are CAD-native formats that represent geometric data precisely, often as NURBS surfaces rather than meshes. Converting a mesh to a CAD-native format can be complex and may require reverse engineering software, especially for highly accurate mechanical parts.
- Export the Model: Use your post-processing software's export function. Pay attention to export options such as scale, units, and whether to include textures.
- Integrate with CAD Software (if applicable): If you're using the scan for reverse engineering, import the mesh into CAD software (e.g., SolidWorks, Fusion 360). You can then use the mesh as a reference to create parametric solid models. This is essential for 3d product design services Ireland.
- Prepare for 3D Printing: Import your STL or OBJ file into a slicer software (e.g., Cura, PrusaSlicer, Bambu Studio). Configure settings like layer height, infill, supports, and material (e.g., buy PLA filament Ireland, PETG, ABS).
- Utilise for Other Applications:
- Measurement & Inspection: Use software to take precise measurements or compare the scanned model against an original CAD model for quality control.
- Digital Archiving: Preserve historical artifacts or prototypes in digital form.
- Virtual Reality/Augmented Reality: Create immersive experiences with real-world objects.
- Art & Animation: Incorporate scanned models into digital art projects or animated scenes.
Tip: Always check the exported file in a viewer or the intended target software to ensure it looks as expected and has no corruption.
Step 8: Beyond the Scan: Integrating with 3D Printing and Design
The journey of a physical object into the digital realm via 3D scanning is often just the beginning. The true power lies in how these 3d scans can be integrated with 3D printing and design workflows to create new possibilities. This step bridges the gap between your digital model and its next physical iteration or design evolution.
At PrintIn3D.ie, we regularly help customers transform their 3D scans into tangible realities. Whether you've scanned a broken part that needs to be replaced, an artistic sculpture you wish to scale, or a concept model to be iterated upon, the integration with 3d printing opens up a world of opportunities. This is particularly relevant for businesses seeking custom 3d printing services Ireland to bring their innovations to life.
- Direct 3D Printing from Scans:
- Once your scan is a watertight STL or OBJ file, it can be directly sent to a 3D printer. This is ideal for exact replicas, prototyping, or creating 3d printed replacement parts service.
- Consider the material: Will you buy PLA filament Ireland for aesthetic parts, or use PETG for durability, or perhaps a more specialized 3d printer filaments for specific properties? PrintIn3D.ie offers a wide range of options.
- Reverse Engineering:
- Import the scan into CAD software. Use the mesh as a template to design new, editable CAD models. This is invaluable for recreating parts where original drawings are lost, or for improving existing designs.
- This process enables the creation of fully functional, dimensionally accurate 3d printed replacement parts service for various industries.
- Design Iteration and Modification:
- Use the scanned model as a starting point for new designs. Modify, combine with other digital elements, or scale the object to create entirely new products or prototypes.
- This approach is fundamental to 3d product design services Ireland, allowing rapid prototyping and testing.
- Scaling and Customisation:
- Easily scale your scanned object up or down. A tiny figurine can become a life-sized sculpture, or a large object can be miniaturised for display.
- Add custom text, logos, or ergonomic features to scanned models before printing, offering unique personalisation.
- Professional Support from PrintIn3D.ie:
- If you have a physical object but no 3D scan, we can provide comprehensive 3D scanning services.
- Already have a 3D scan? Upload your file to PrintIn3D.ie for high-quality custom 3d printing services Ireland, available in various 3d printer filaments like PLA and PETG. We ensure your digital model becomes a perfect physical reality.
- Need design help? Our 3d product design services Ireland can take your raw scan data and transform it into functional or aesthetic designs.
Tip: When printing scanned objects, remember that the quality of your print will directly reflect the quality of your scan. A clean, watertight, and properly scaled mesh is key to a successful print.
Common Mistakes to Avoid When Working with 3D Scans
3D scanning can be a powerful tool, but like any technology, it comes with its pitfalls. Being aware of common mistakes can save you significant time, effort, and frustration. Avoiding these issues will ensure your projects, from simple reproductions to complex custom 3d printing services ireland, proceed smoothly.
- Inadequate Object Preparation: Failing to clean, de-gloss, or stabilise an object is the most common reason for poor scan quality. Reflective surfaces or dust lead to noisy data or missing sections.
- Insufficient Scan Overlap: When performing multiple individual scans, not providing enough overlap between shots makes it difficult for software to accurately align them, resulting in misaligned or distorted models.
- Rushing the Scan Process: Hasty scanning leads to missed areas, inconsistent data capture, and vibrations, all of which degrade the quality of the raw data. Patience is key.
- Ignoring Post-Processing: Expecting raw scan data to be print-ready is a common misconception. Uncleaned, unaligned, and unmeshed data is rarely usable and requires dedicated post-processing steps.
- Forgetting to Check Watertightness: For 3D printing, a model must be completely enclosed. Printing a non-watertight model will lead to errors, failed prints, or unpredictable results.
- Incorrect Scaling or Units: Exporting or printing a model at the wrong scale or with incorrect units can lead to physical objects that are too large, too small, or don't fit their intended purpose. Always verify dimensions.
- Over-Simplifying the Mesh: While reducing polygon count is often necessary, over-decimation can strip away crucial fine details, making the final model look crude or inaccurate.
- Using the Wrong File Format: Attempting to use an STL for advanced CAD design (which prefers solid models) or expecting an OBJ to be handled by basic 3D printing software (without colour support) can lead to compatibility issues.
- Underestimating Hardware/Software Requirements: High-quality 3D scanning and post-processing can be resource-intensive. Using underpowered computers or outdated software can severely hamper workflow and performance.
- Not Seeking Professional Help: For complex, high-accuracy, or time-sensitive projects, attempting a DIY scan without the right equipment or expertise can be a costly mistake. Professional 3D scanning services in Ireland can deliver superior results efficiently.
FAQ: Your Questions About 3D Scans Answered
What is 3D scanning primarily used for?
3D scanning has a vast array of applications across many industries. It's primarily used for reverse engineering existing parts, rapid prototyping for new product development, quality inspection and measurement, digital archiving of cultural heritage items, creating custom-fit medical devices, and generating digital assets for virtual reality, gaming, and animation. For individuals, it's fantastic for replicating existing objects or turning physical creations into digital files for 3D printing. Whether you're in 3d printing Dublin or need a 3d printer Berlin, the applications are endless.
How accurate are 3D scans?
The accuracy of 3D scans can vary significantly depending on the scanning technology used, the quality of the scanner, the object's complexity and material, and the operator's skill. High-end industrial scanners can achieve accuracies down to a few microns (thousandths of a millimetre), suitable for precision engineering and quality control. More affordable desktop or handheld scanners might offer accuracies in the range of 0.05mm to 0.5mm, which is perfectly sufficient for most prototyping, artistic, or general replication purposes. Professional 3d scanning service providers typically use high-precision equipment to meet stringent accuracy requirements.
What file formats do 3D scanners produce, and which is best for 3D printing?
3D scanners typically produce raw data in formats like point clouds (e.g., .ply, .pts, .xyz) or meshes (e.g., .stl, .obj). For 3D printing, the industry standard and most widely accepted format is STL (.stl). This format represents the object's surface as a series of interconnected triangles and is compatible with virtually all slicing software and 3D printers. OBJ (.obj) is also a common choice, especially if colour or texture information needs to be included, though it's less universally supported for direct printing than STL. For precise CAD integration, you might aim for converted STEP (.stp) or IGES (.igs) files, though this requires more advanced reverse engineering from the mesh data.
Can I use a 3D scan to create a 3d body scanning service for a person?
Yes, 3D scanning technology can definitely be used for people, which falls under the category of a 3d body scanning service. Specialized full-body scanners or even high-quality handheld scanners are employed for this purpose. Applications include custom clothing design, creating personalised figurines, tracking fitness progress, medical prosthetics and orthotics, and even virtual reality avatars. When scanning people, speed is crucial to minimise movement, and safety is paramount, typically using structured light or safe laser technologies. If you're interested in a 3d body scanning service in Ireland, it's best to consult with a professional provider who has the appropriate equipment and expertise.
How can PrintIn3D.ie help with my 3D scan project?
PrintIn3D.ie is your comprehensive partner for 3D printing, 3D design, and 3D scanning projects in Ireland and across the EU/EEA. If you have a physical object you need to digitise, we offer professional 3D scanning services to create high-quality digital models. Once you have a 3D scan file (STL, OBJ, etc.), you can simply upload it to our platform for custom 3d printing services Ireland, where we can bring your digital design to life using a wide selection of 3d printer filaments, including buy PLA filament Ireland and PETG. We also provide 3d product design services Ireland to modify your scans or create new designs from scratch, ensuring a hassle-free journey from concept to reality.
Next Steps: Bring Your 3D Scans to Life with PrintIn3D.ie
Now that you understand the powerful world of 3D scanning, it's time to put your knowledge into action. Whether you have a physical object ready for scanning, a digital 3D scan file ready for printing, or just an idea that needs to be designed, PrintIn3D.ie is here to help you every step of the way. Visit our custom 3D printing services page to upload your files or learn more about how we can transform your digital creations into physical realities with our award-winning service and extensive range of 3d printer filaments.